
A junction object is a custom object with two master-detail relationships, and it is the key to making a many-to-many relationship.Let us assume we are having HR’s recruiting app and now we are going to create a junction object called Job Posting.
A job posting fits into the space between positions and employment websites. One position can be posted many times, and one employment website can have many job postings, but a job posting always represents a single position on a single employment website.
In essence, the Job Posting object has a many-to-one relationship with both the Position and the Job Posting Site objects. Through those many-to-one relationships, you create a many-to-many relationship between the Position and Job Posting Site objects.
- From Setup, click Object Manager.
- Click Create, select Custom Object, and fill in the details.
Field Value Label Job Posting Plural Label Job Postings Record Name Job Posting Number Data Type Auto Number Display Format JOBPOST-{0000} Starting Number 1 - Leave everything else as is, and click Save.
- Next, create the master-detail relationship between Job Posting and Position.
- While still viewing Job Posting in Object Manager, click Fields & Relationships, then New.
- Select Master-Detail Relationship as the Data Type.
- Click Next.
- For Related to, select Position.
- Click Next.
- For Field Label, enter
Position. - Click Next, Next, Next and Save & New.
Now fill in the details for a master-detail relationship between Job Posting and Job Posting Site.
- Select Master-Detail Relationship as the Data Type.
- Click Next.
- For Related to, select Job Posting Site.
- Click Next.
- For Field Label, enter
Job Posting Site. - Click Next, Next, Next and Save.
Next, add fields to the Job Posting Site related list on the Position page layout.
- From Setup, click Object Manager.
- Click Position, then Page Layouts.
- Click
 next to Position Layout and select Edit.
 - Scroll down to the Job Postings related list, and click
 in the header to edit it.
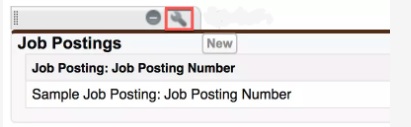
- From the Available Fields section, select
- Job Posting Site: Status
- Job Posting Site: Technical Site
- Click Add.
- From the Selected Fields section, select Job Posting: Job Posting Number and click Remove.
- Click OK, then click Save.
Finally, add fields to the Position related list on the Job Posting Site page layout.
- From Setup, click Object Manager.
- Click Job Posting Site, then Page Layouts.
- Click
 next to Job Posting Site Layout and select Edit.
 - Scroll down to the Job Postings related list and click
 in the header to edit it.
 - From the Available Fields section, select
- Position: Status
- Position: Title
- Click Add.
- From the Selected Fields section, select Job Posting: Job Posting Number and click Remove.
- Click OK, then Save.
Now let’s test what you’ve just done by creating a Job Posting record.
- Click
 to open the App Launcher, then click Recruiting.
 - Click the Positions tab, then New, then enter the details of the new position.
Field Value Title Super Sales Rep Department Sales Approval Status Approved Location US Job Description Sales rep to join the AW Computing team serving the eastern region of AMER - Click Save.
- Click the Job Posting Sites tab, then New, and enter the details.
Field Value Site Name Lots-O-Jobs Job Posting Site www.Lotsojobs.com Status Active - Click Save.
- On the Job Posting Site record you just created, click the Related tab.
- On the Job Postings related list, click New. For Position, search for and select Super Sales Rep and click Save.
This training blog is much more useful to learn about junction object.
