
To make logging into Salesforce faster and more secure, we have enabled passwordless login using passkeys for your organization.
This allows you to log in using your device’s built-in security, such as a fingerprint, facial recognition, or a PIN.
Admin Setup Completed
The backend Identity Verification setup has already been completed in your Salesforce org. You only need to follow the steps below to configure your own device and profile.
Step 1: Prepare Your Device
Before registering your passkey in Salesforce, make sure your computer is set up to use a PIN or biometric login.
Choose the section below that matches your device.
For Windows Users
- Open your computer’s Settings and click on Accounts.
- Select Sign-in options.
- Set up a Windows Hello method. Choose either PIN, Fingerprint, or Face Recognition.
For Mac (Apple) Users
- Open System Settings or System Preferences.
- Click Touch ID & Password.
- Follow the on-screen prompts to add your fingerprint.
- Ensure your iCloud Keychain is enabled, as Apple requires this to safely store your passkeys.
For Google Password Manager Users (Chrome & Android)
If you’d rather store your passkey in your Google Account instead of relying on Windows Hello or Touch ID, you can use Google Password Manager.
This is a great option if you switch between devices often, since your passkey syncs across any device where you’re signed into Chrome.
- Open Google Chrome and make sure you’re signed in to your Google Account. Click your profile icon in the top-right corner to check.
- Go to Settings → Autofill and passwords → Google Password Manager. You can also go directly to passwords.google.com.
- Click Settings in the left-hand menu of Password Manager.
- Under “On-device encryption,” confirm that passkeys are enabled to sync with your Google Account.
- If prompted, set up a screen lock such as a PIN, pattern, fingerprint, or face unlock. Google Password Manager uses this to protect your saved passkeys.
- Once set up, Google Password Manager will automatically appear as a login option whenever a website, including Salesforce, asks you to create or use a passkey.
Step 2: Register Your Passkey in Salesforce
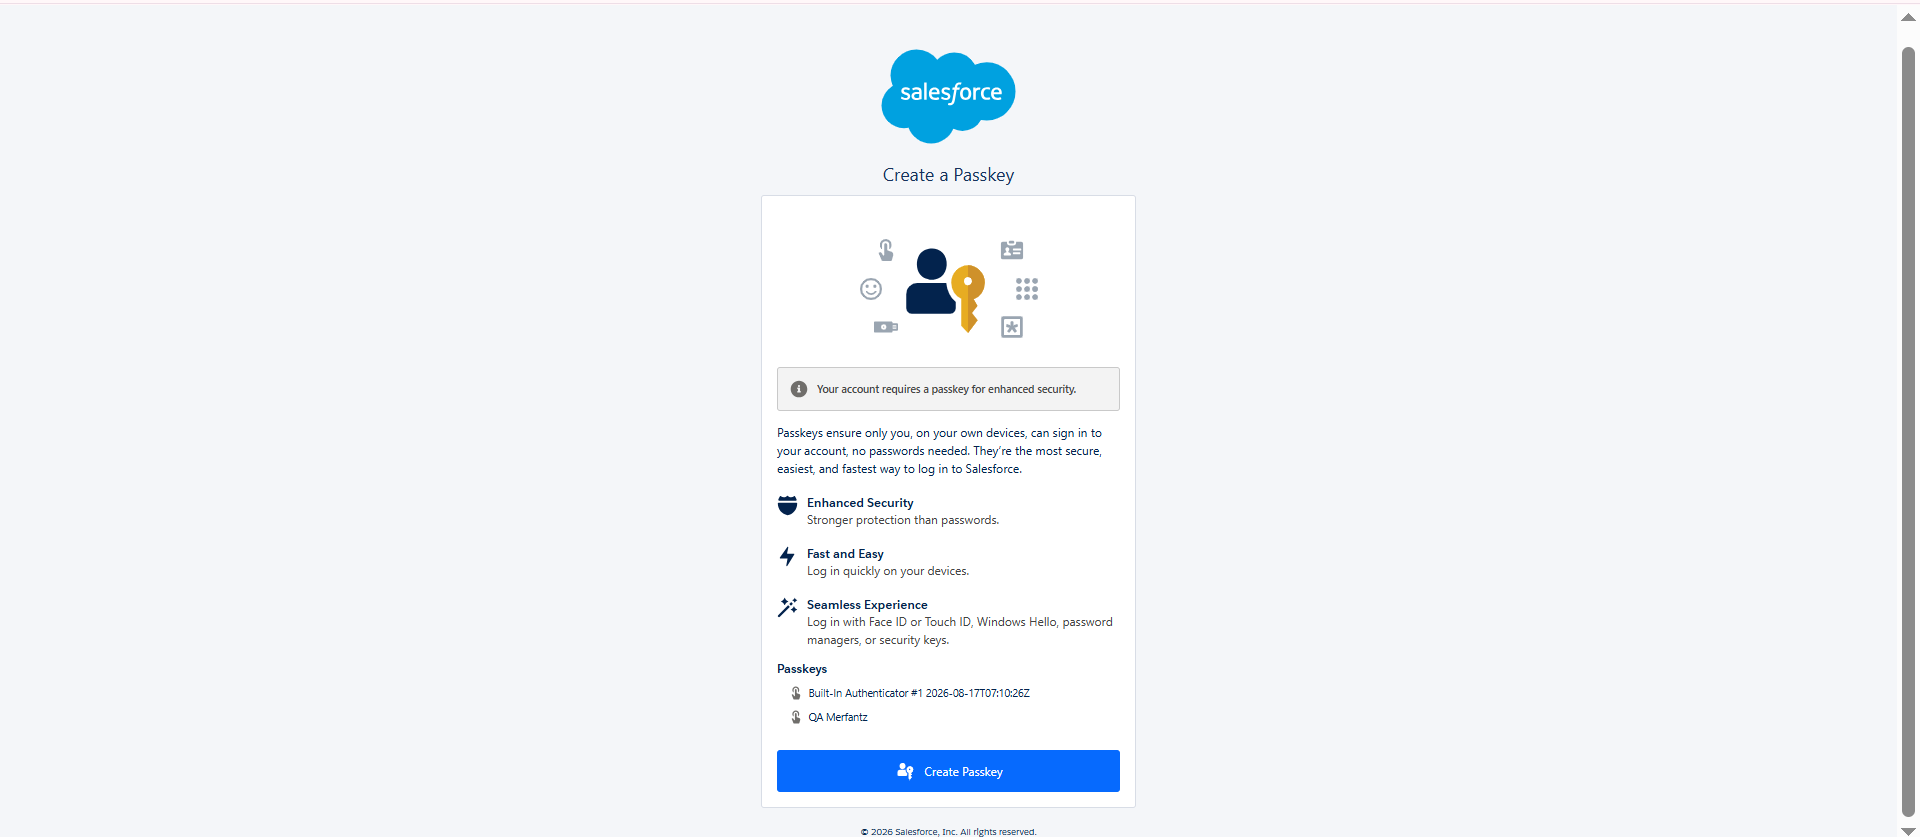
Once your device or Google Password Manager is ready, link it to your Salesforce profile.
- Log in to Salesforce and click your Profile icon in the top-right corner.
- Click Settings, then navigate to Advanced User Details on the left-hand menu.
- Scroll down to the Built-in Authenticator section and click Add.
- Click Verify.
- A security prompt will pop up. Complete it using the method you set up in Step 1, such as Windows PIN, Face ID, Mac Touch ID, or Google Password Manager.
- Once successfully verified, click Save.
Success!
You can now use your passkey to log in to Salesforce quickly and securely — no password required.
Which Option Should You Choose?
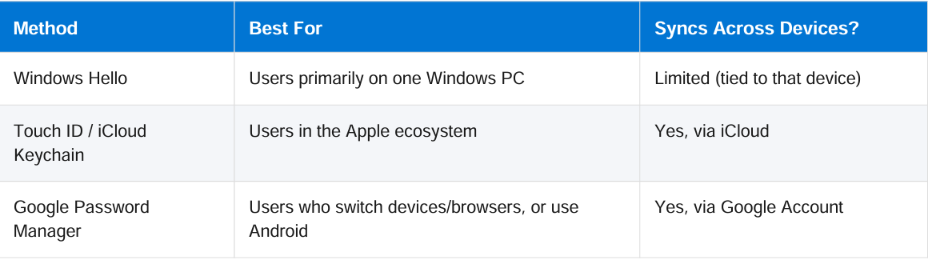
Whichever method you choose, the result is the same: faster logins, stronger security, and one less password to remember.
Author Bio

Co-Founder & CMO at Merfantz Technologies Pvt Ltd | Marketing Manager for FieldAx Field Service Software | Salesforce All-Star Ranger and Community Contributor | Salesforce Content Creation for Knowledge Sharing