
2 min read
Overview
This article walks you through the complete Order-to-Invoice process in Salesforce FieldAx for Airquip.
Once a Quote is approved, FieldAx automatically creates the related Order. From the Quote record, you can access the Order through Quick Links. The Order can then be scheduled as a Job and assigned to a Technician.
The Technician logs in to FieldAx using their own Technician account on a mobile device and completes the Job through the FieldAx mobile workflow. During the Job, the Technician can record work performed, add Items, attach photos, and complete the required Debrief and Service Report.
Once the Job is completed, FieldAx automatically generates the Invoice when Invoice Required is enabled. The Invoice can then be reviewed, updated, previewed, and sent to the customer.
For customers purchasing parts without requiring a Job or Order, a Walk-In Parts Invoice can be created directly from the Invoices page.
Quick Summary
- Approve the Quote — FieldAx automatically creates the Order.
- After closing the Job Scheduling window, return to the Quote record.
- From Quick Links, click Order to open the automatically created Order.
- Use Book Appointment to schedule the Job and assign a Technician.
- The Technician logs in using their own Technician account on the FieldAx mobile application.
- The Technician progresses through Accept → Enroute → Clock-In → Work → Debrief → Complete.
- Debrief is mandatory. The Job cannot be completed until the Debrief is completed.
- The Technician can add Items, attach photos, and complete the Service Report.
- Once the Job is completed, the Invoice is generated automatically when Invoice Required is enabled.
- Review and update the Invoice and Invoice Line Items as required.
- Preview and send the Invoice to the customer.
- Use Consolidated Invoice when multiple invoices need to be combined for the same Account.
- Use Walk-In Parts Invoice when a customer purchases parts without requiring a Job or Order.
Step 1: Approve the Quote and Complete Job Scheduling
Once the customer has approved the Quote, click Approve/Reject in the top-right corner of the Quote page and select Approve.
When the Quote is approved:
- The linked Opportunity is automatically set to Closed Won.
- An Order is created automatically.
- A Create Job from Approved Quote pop-up appears.
Complete the required Job information and create the Job. You will then be taken to the Job Scheduling calendar, where you can assign a Technician and schedule the Job.
Once the scheduling activity is complete, close the Job Scheduling window.
Create Job from Approved Quote and Job Scheduling.
Note: The Order is created automatically when the Quote is approved. You do not need to manually create the Order.
Step 2: Open the Order from the Quote
After the Quote has been approved and the Job Scheduling window has been closed, you will be returned to the Quote record.
The Order is automatically created when the Quote is approved, so there is no need to create the Order manually.
To open the Order:
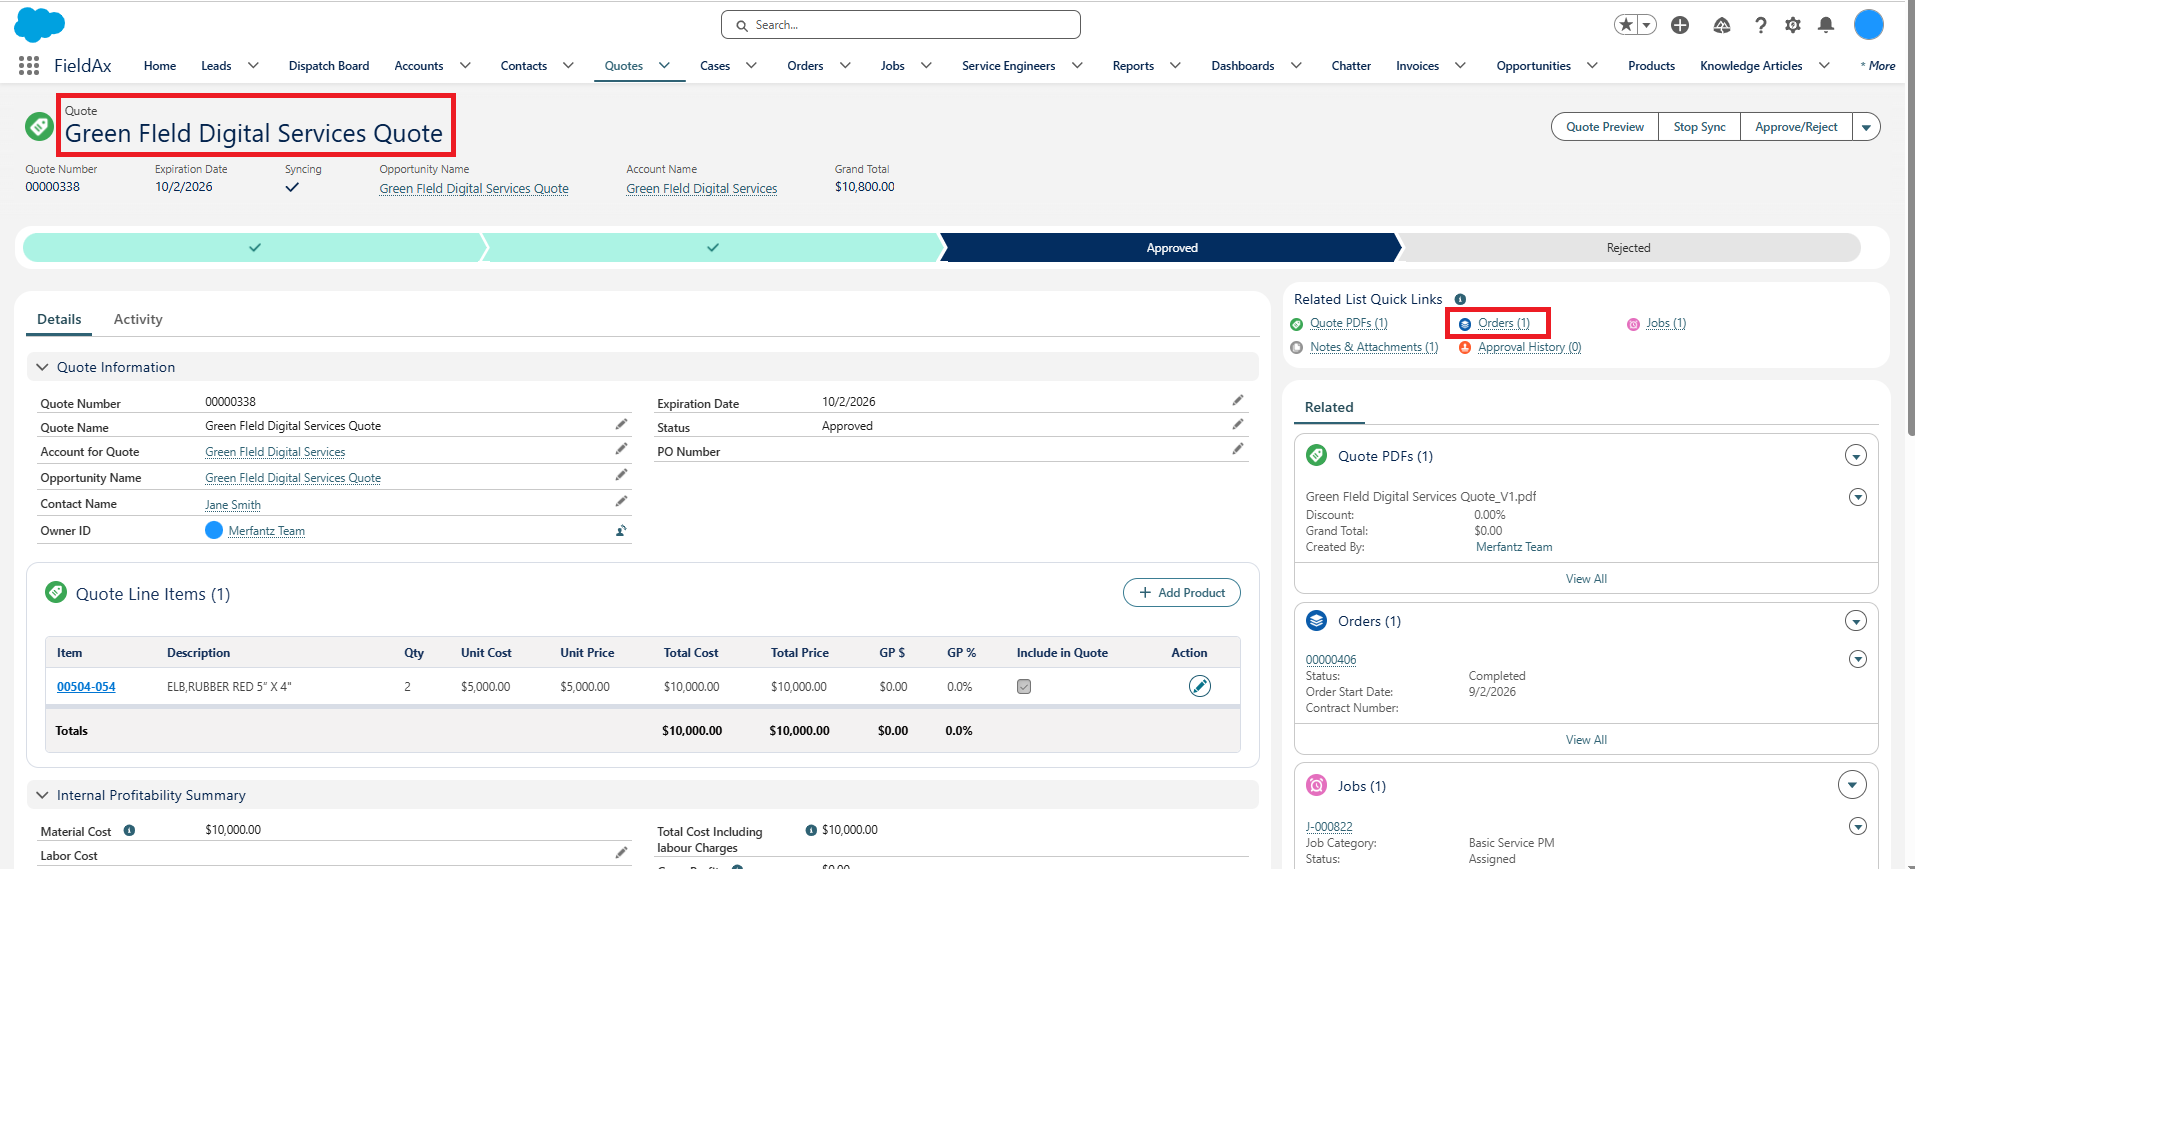
- On the Quote page, navigate to the Quick Links section.
- Click Order to open the automatically created Order record.
Order link in the Quick Links section.
Note: Since the Order is created automatically after the Quote is approved, you can access it directly from the Quick Links section without creating it manually.
Step 3: Schedule the Job from the Order
Once you open the Order, you can use Book Appointment to schedule the Job.
The Book Appointment option allows you to select the appointment date, time, and Technician assignment.
- Open the Order record.
- Click Book Appointment.
- Select the required Date and Time.
- Assign the required Technician.
- Confirm the appointment.
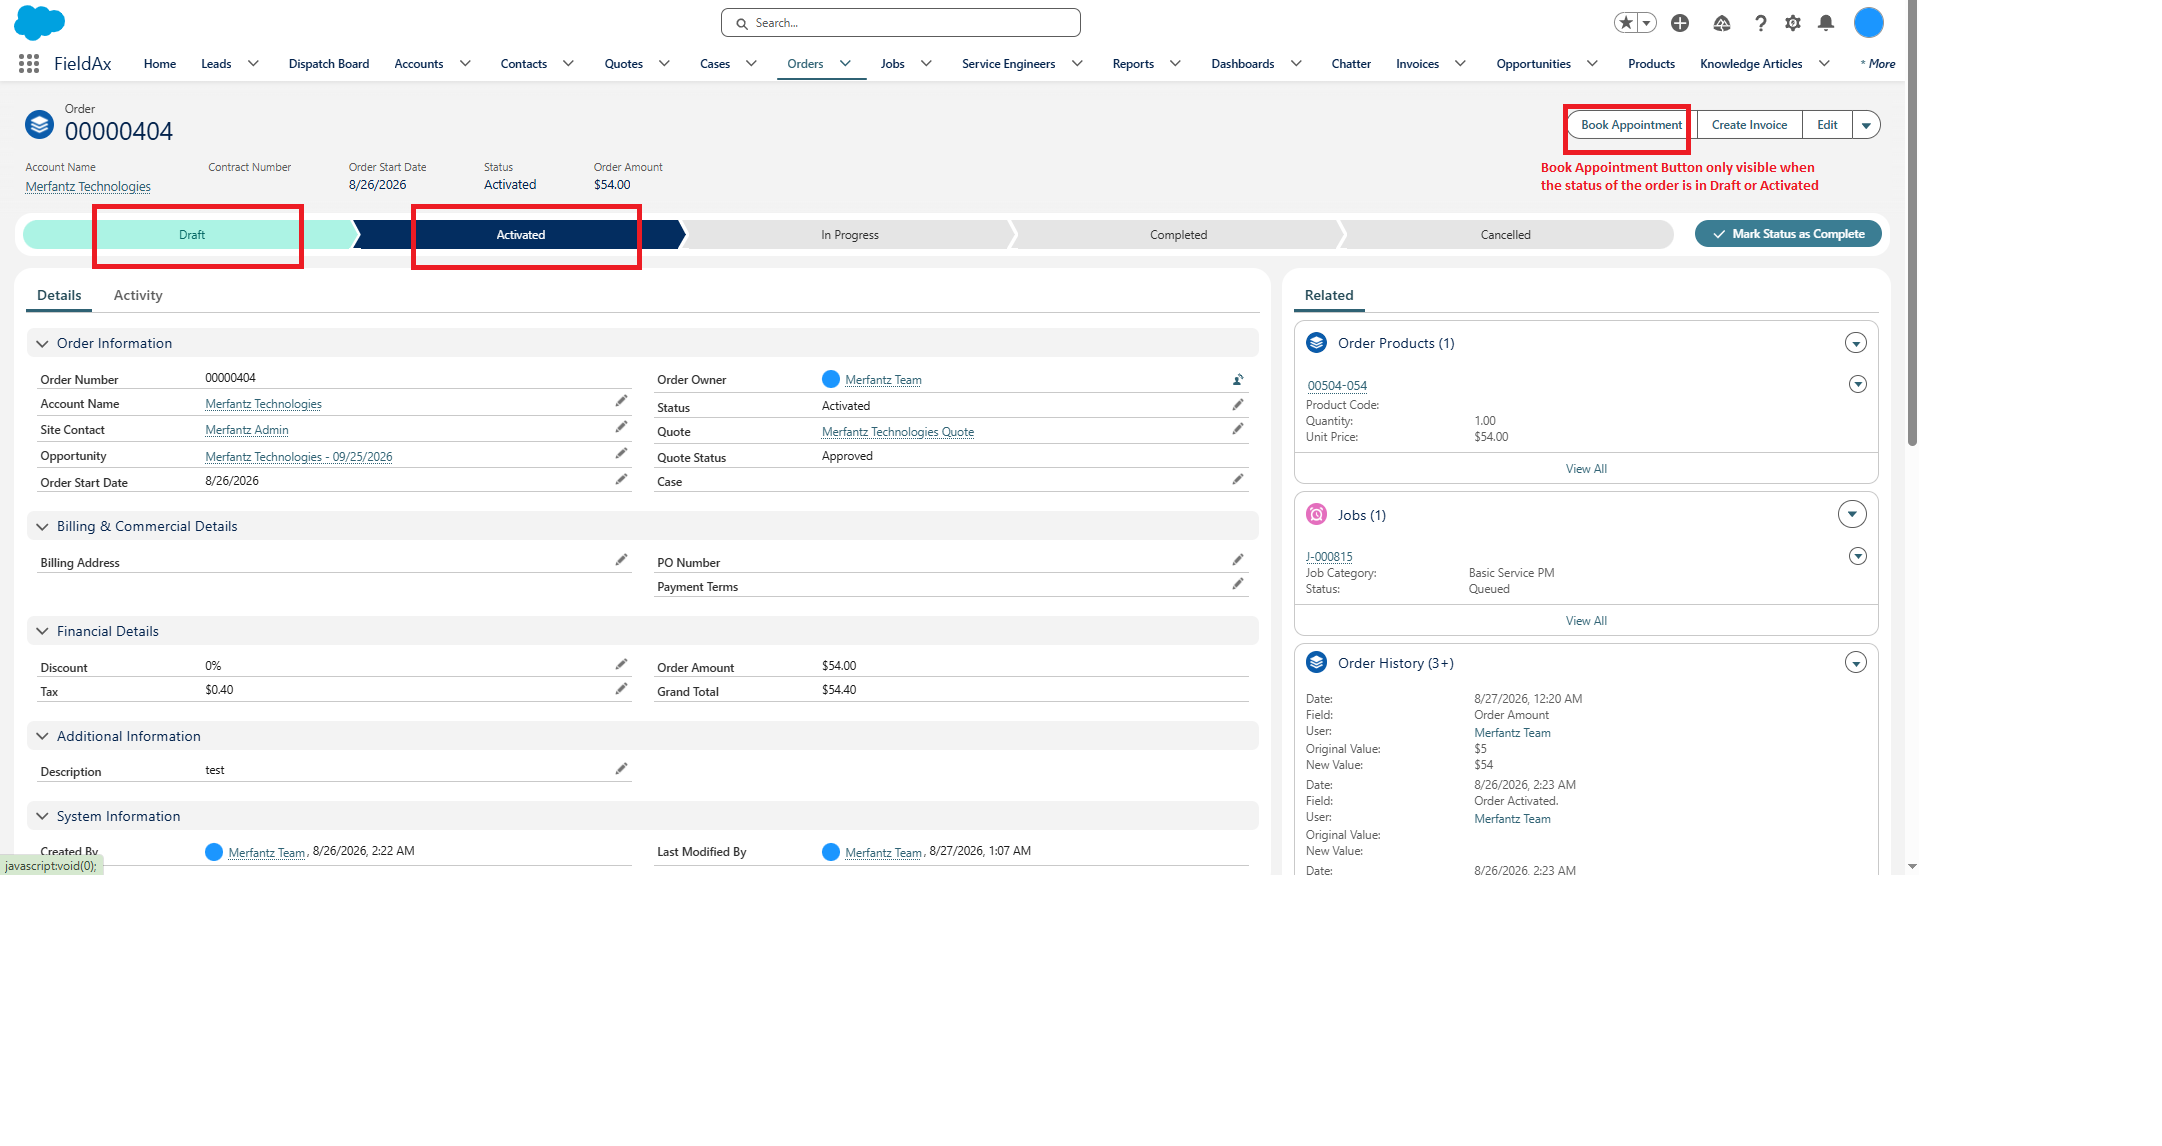
Book Appointment option on the Order page. (Book Appointment only visible when the status of the order is Draft or Activated)
Note: Book Appointment allows the Job to be scheduled directly from the Order without requiring separate manual scheduling steps.
Step 4: Technician Logs In and Starts the Job
Once the Job has been scheduled, the assigned Technician uses their own FieldAx Technician account to access the Job from the FieldAx mobile application.
The Technician should log in using their assigned credentials and open the Job from their mobile device.
Once the Job is available, the Technician can begin the Job workflow.
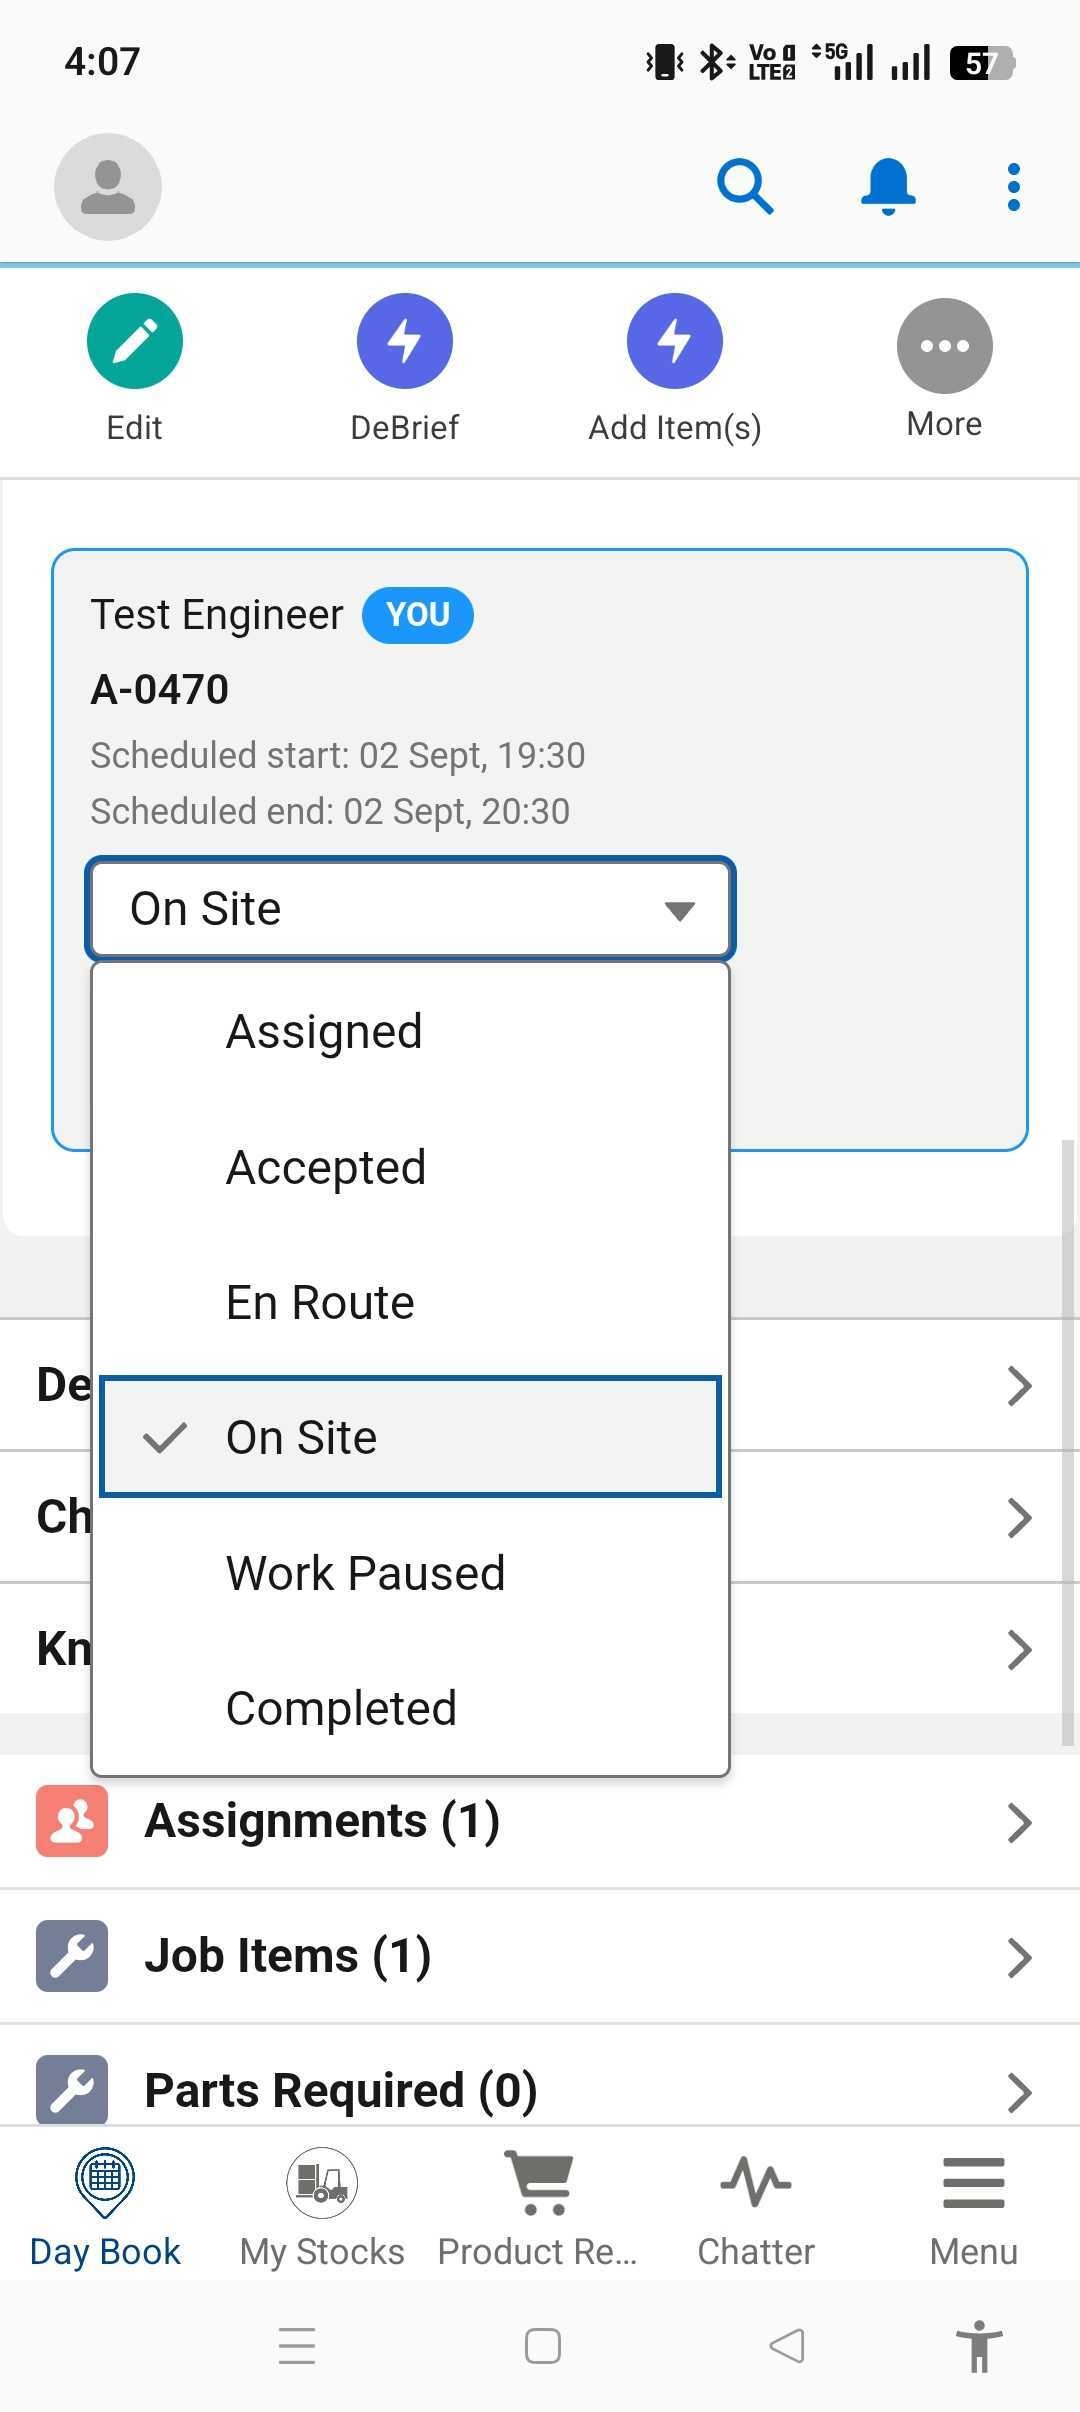
Technician login and Job list on the FieldAx mobile application.
Step 5: Job Process, Add Items, Photos and Service Information
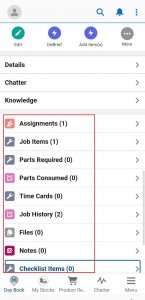
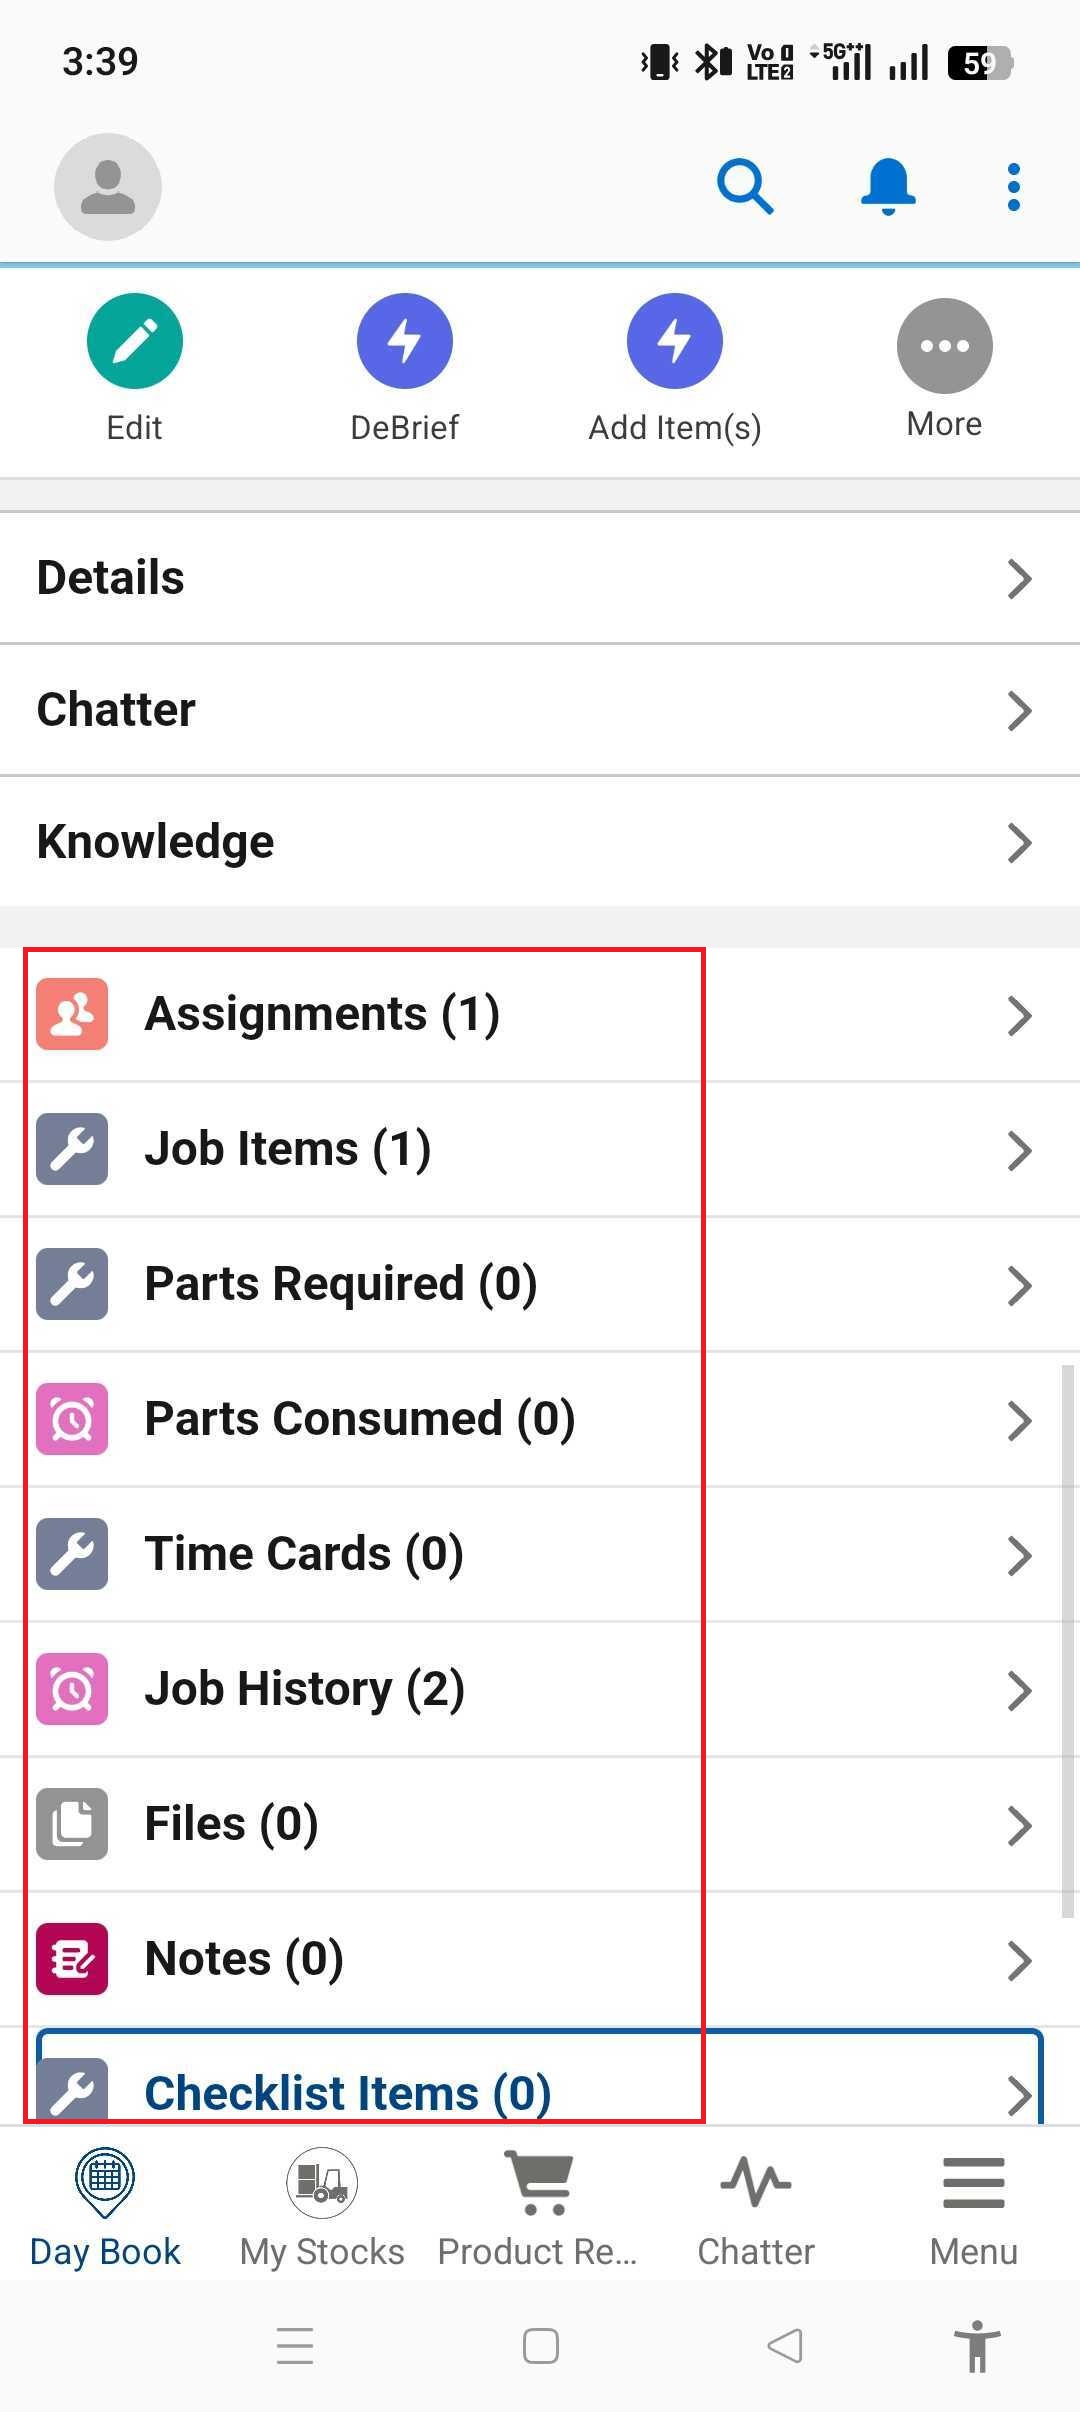
After logging in as a Technician on the FieldAx mobile application, the Technician can access the Day Book to view the Jobs assigned to them.
- View Assigned Jobs: Use the Day Book and select the required date to view the number of assigned Jobs, their status, and the day’s assignments. Only the Technician assigned to the Job can view and update that Assignment.
- Accept: The Technician must first change the Assignment status to Accepted.
- Enroute: When the Technician starts travelling to the customer location, change the status to Enroute. FieldAx automatically starts tracking the Travel Time.
- Onsite: When the Technician reaches the customer location, change the status to Onsite. Travel Time stops automatically and is captured in the Time Card. FieldAx then starts tracking the Actual Working Time.
- Work / Work Paused: The Technician performs the work and can use Work Paused when the Job needs to continue on another day. If travel is required again, the Technician can change the status to Enroute → Onsite → Work. Each status change automatically captures the corresponding time.
- Parts & Debrief: From the More (⋮) menu, the Technician can record Parts Consumed or request additional parts when required. The Technician must complete the Debrief, as it is mandatory for Job completion.
- Photos & Work Details: Attach photos and update the work performed as required.
- Complete Assignment: Change the Assignment status to Completed, then use More (⋮) → Complete. The Technician and Customer provide their required signatures before the Assignment is completed.
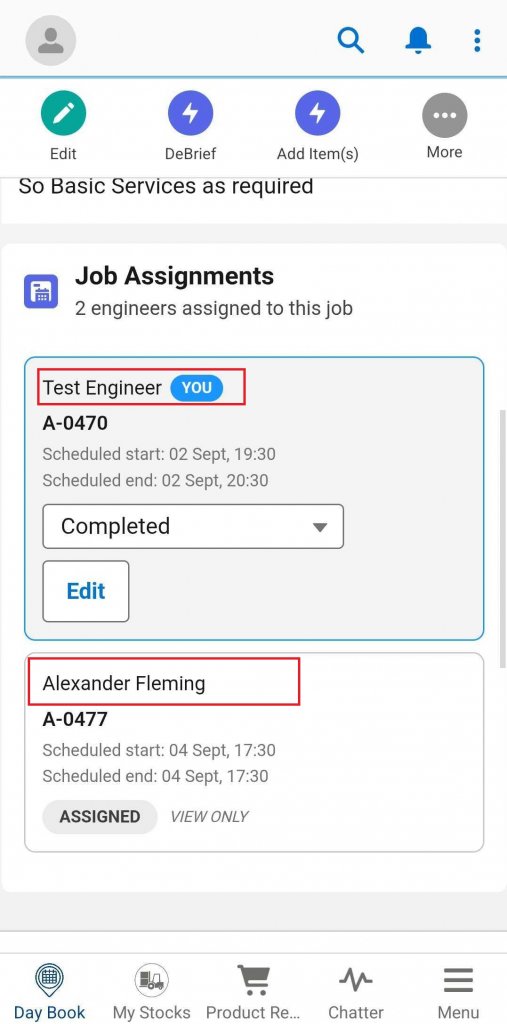
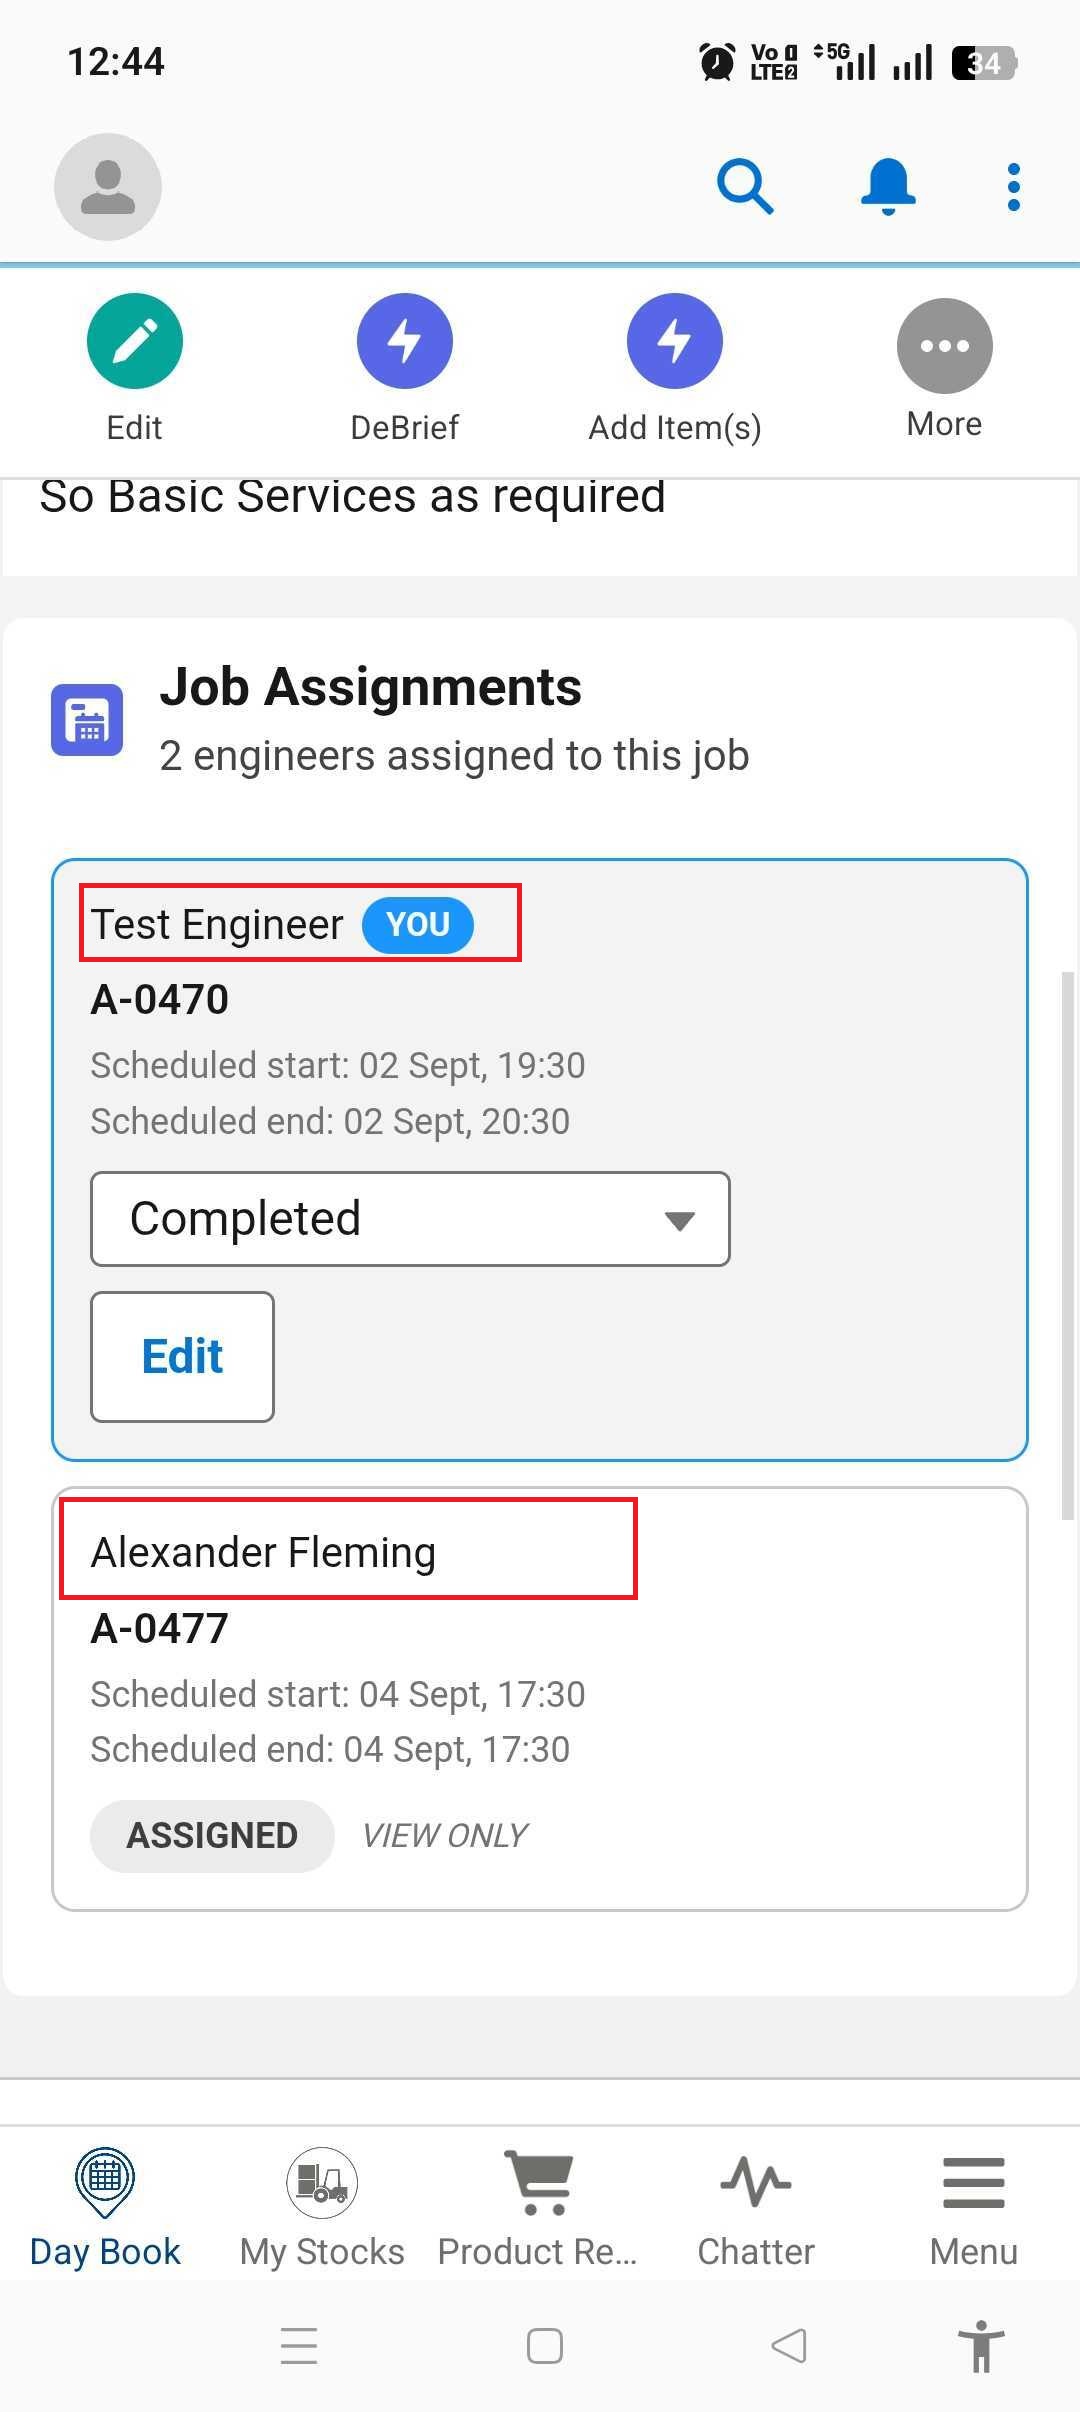
- Multiple Technicians: When multiple Technicians are assigned to the same Job, each Technician can only view and update their own Assignment. All Assignments must be completed before the Job itself can be completed. The last Technician completing the final Assignment can complete the Job.
- Automatic Generation: Once the Job is completed, the Invoice and Service Report are generated automatically.
Status Flow:
Accepted → Enroute → Onsite → Work → Work Paused (if required) → Completed → Complete Job
Important: Debrief is mandatory. If the Debrief has not been completed, FieldAx will not allow the Technician to complete the Job.
Step 6: Complete the Job and Generate the Invoice
Once all required work has been completed and the mandatory Debrief has been submitted, the Technician can complete the Job.
When the Job is completed, FieldAx generates the Invoice automatically when Invoice Required is enabled.
This eliminates the need to manually create an Invoice after every completed Job.
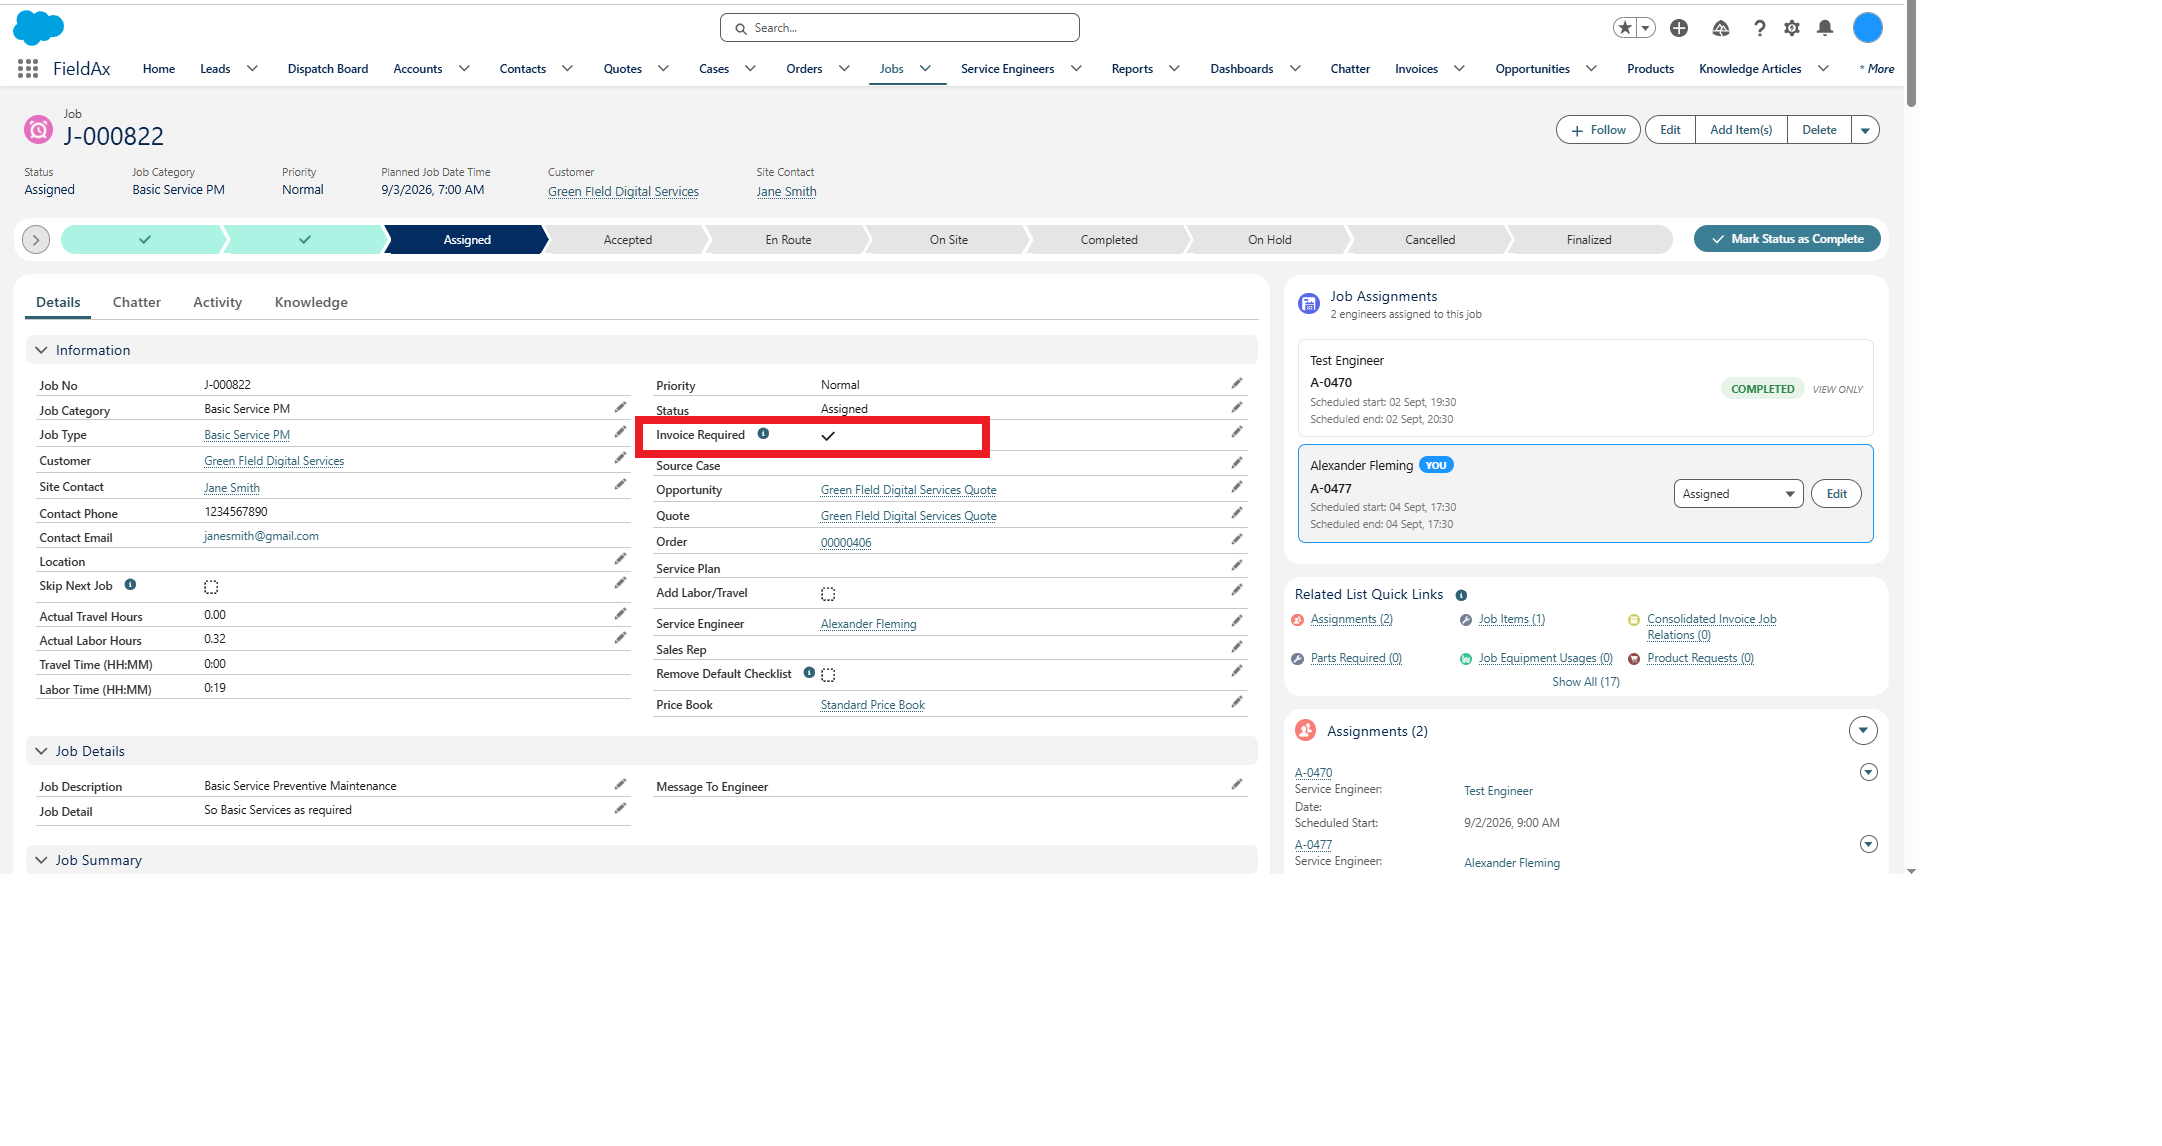
Job completion and automatic Invoice generation.
When an Invoice Is Not Required
For a Job that does not require billing, set Invoice Required to False.
When Invoice Required = False, FieldAx will not automatically generate an Invoice when the Job is completed.
Note: Use this option for Jobs that should not result in a customer Invoice, such as internal or non-billable Jobs.
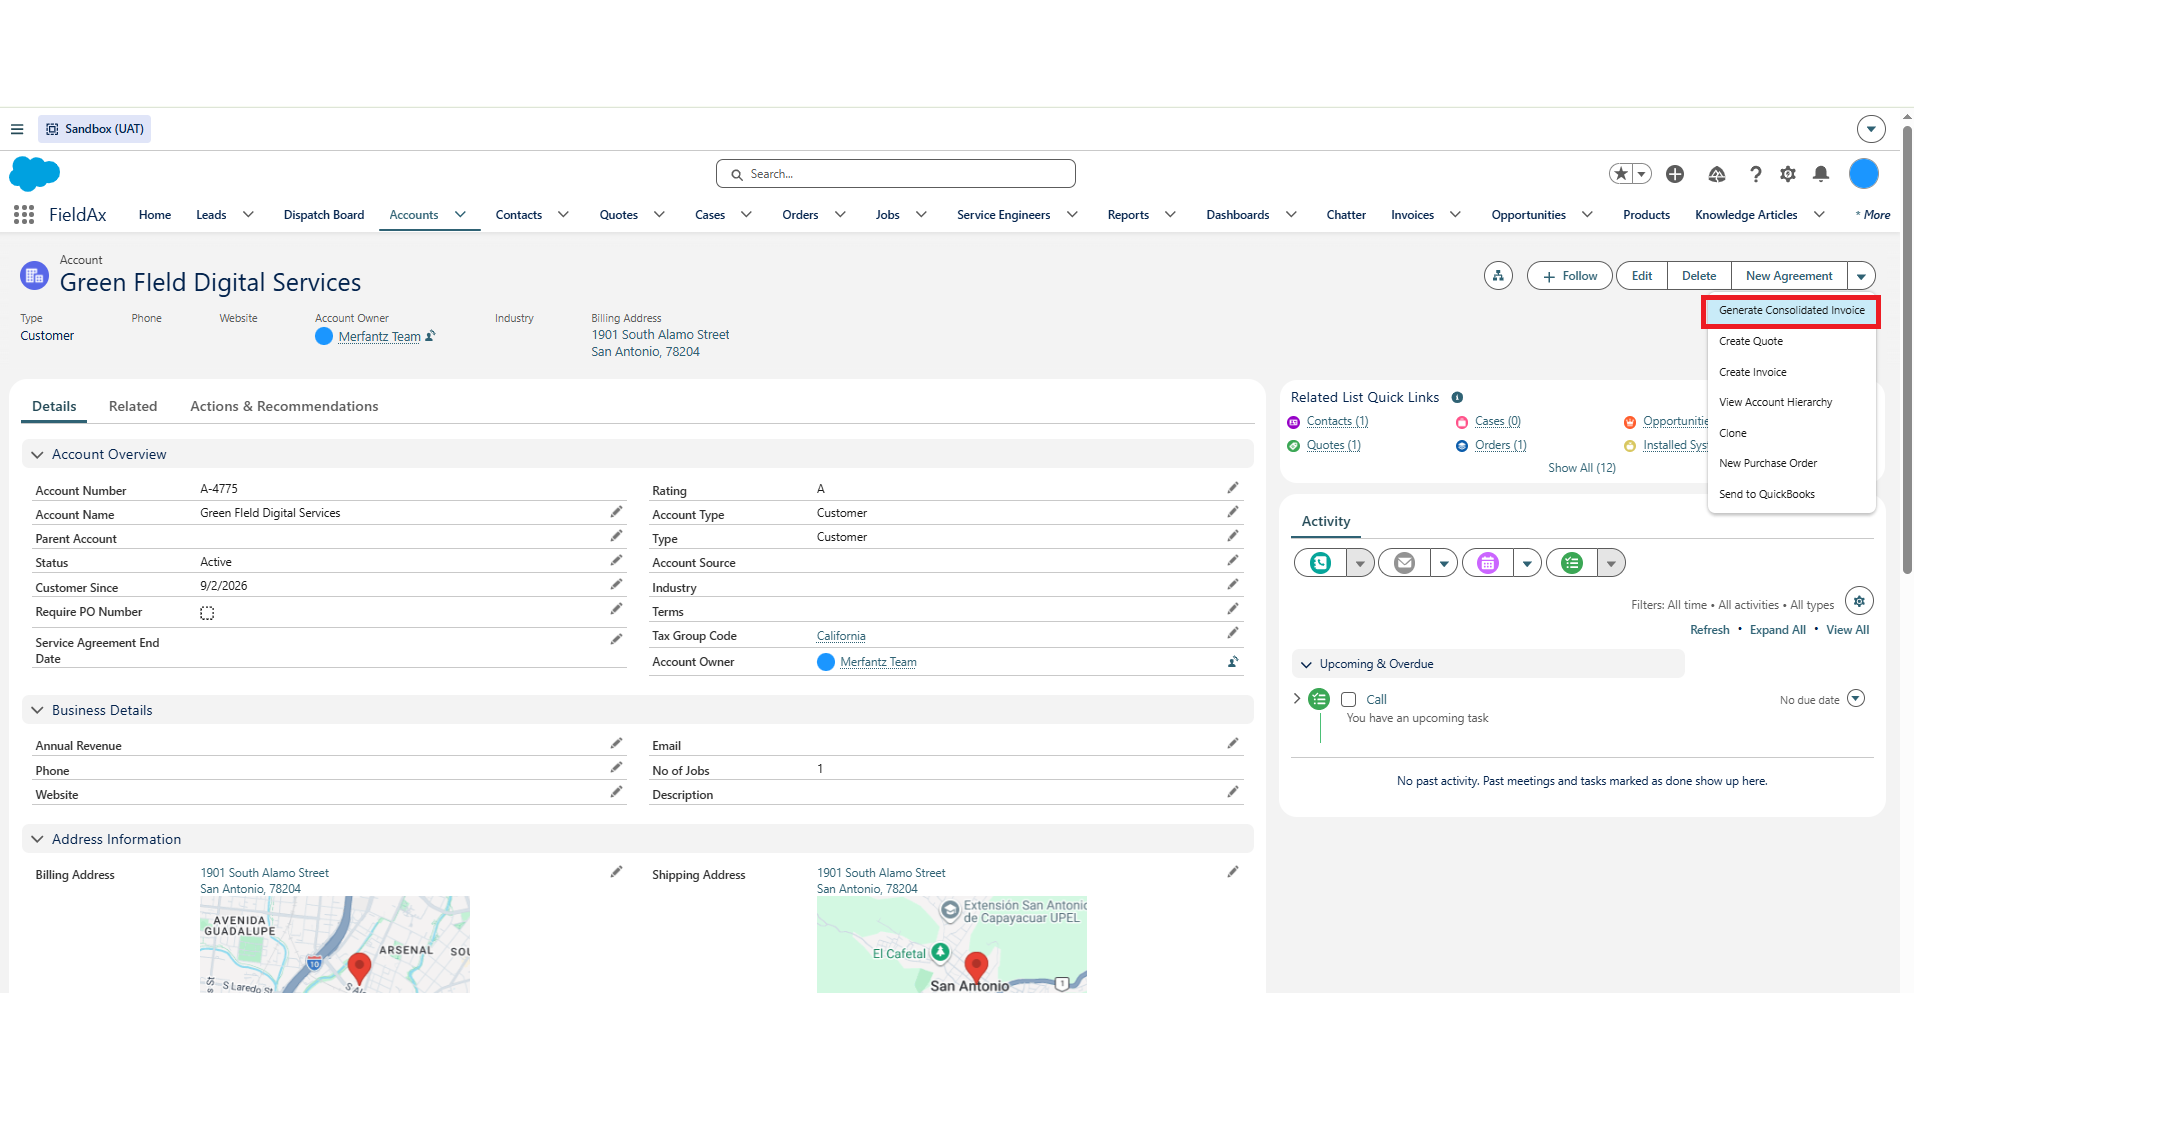
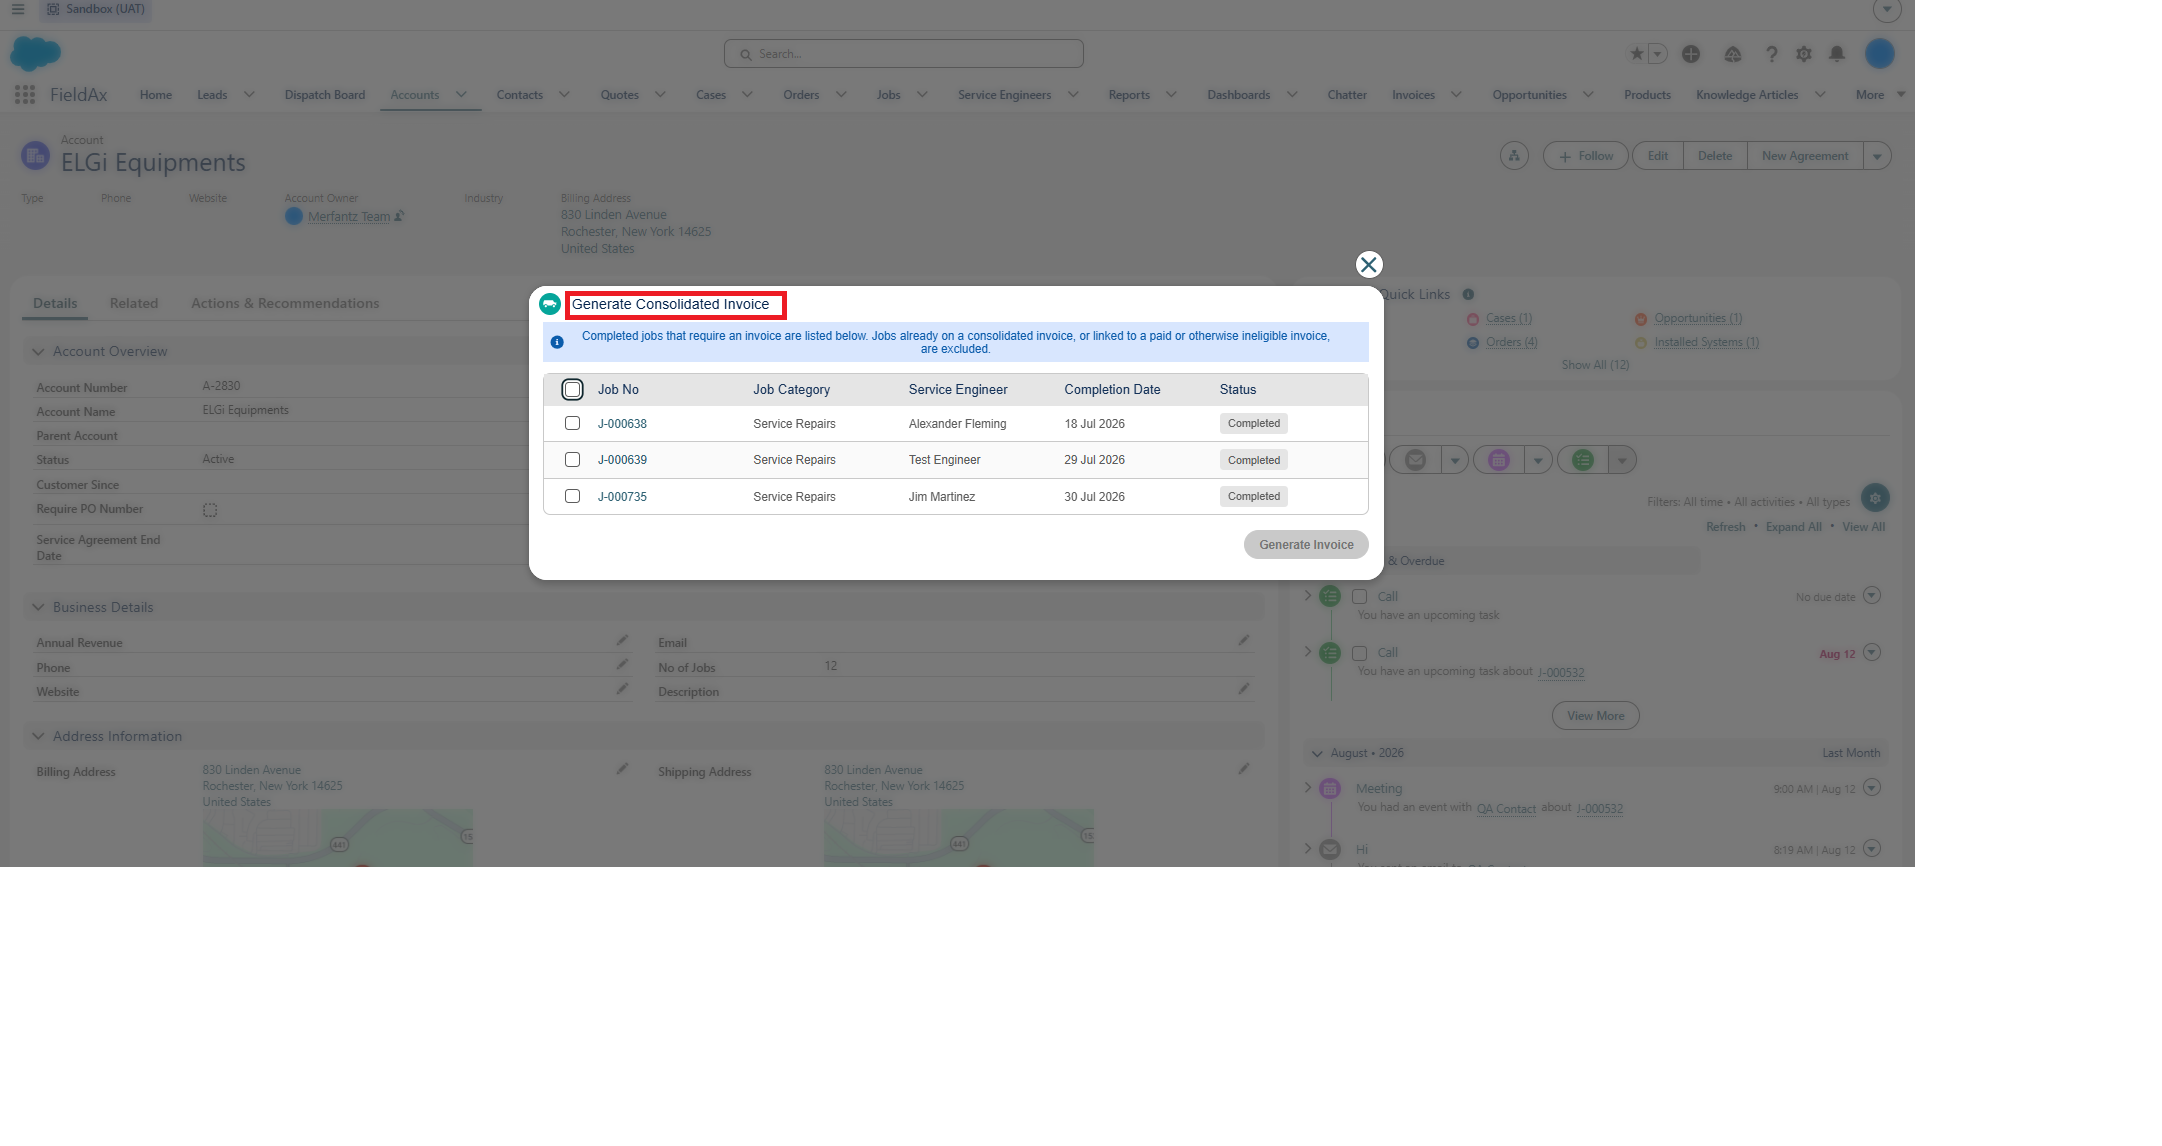
Step 8: Review and Update the Invoice
Once the Invoice has been generated, open the Invoice record and review the information before sending it to the customer.
You can preview:
- Customer / Account information
- Invoice details
- Invoice status
- Invoice Line Items
- Quantity and pricing
- Applicable taxes and totals
If required, update the Invoice details before sending it.
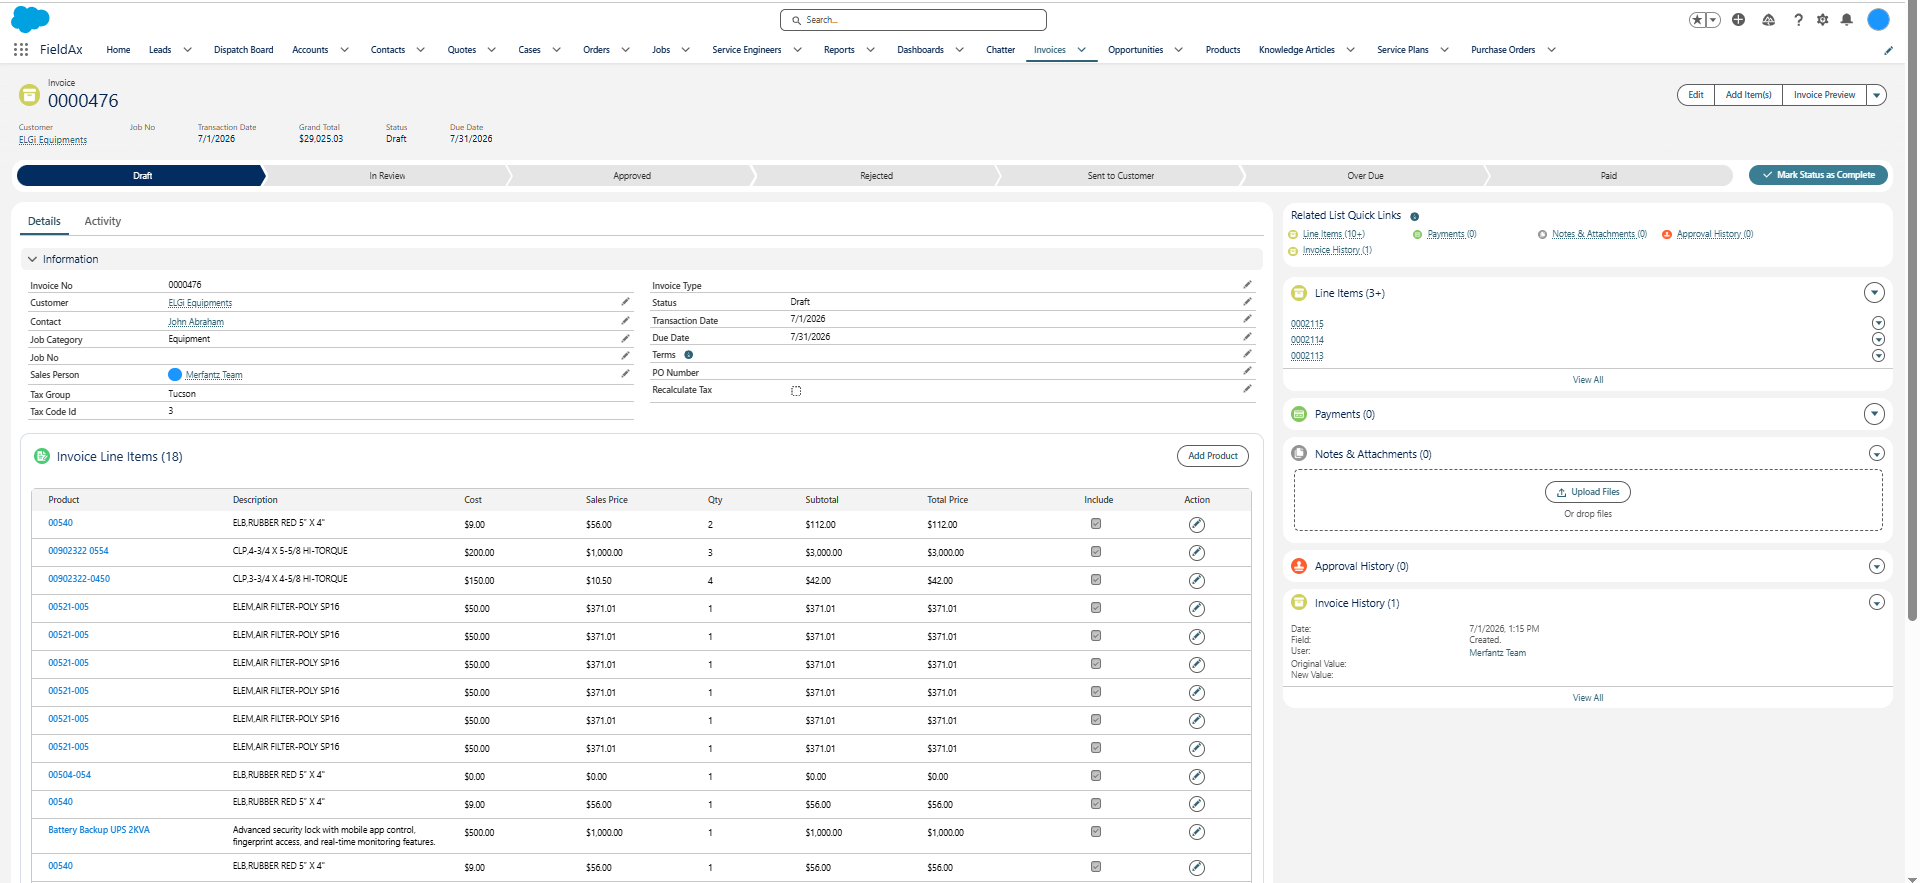
Invoice record page.
Add or Update Invoice Line Items
Review the Invoice Line Items to make sure all required products, services, quantities, and prices are included.
- Open the Invoice record.
- Navigate to the Invoice Line Items section.
- Click Add Item to add an additional Item when required.
- Edit an existing Invoice Line Item if changes are required.
- Review the updated Invoice totals.
Note: Review the Invoice Line Items carefully before sending the Invoice to ensure that the customer is billed correctly.
Step 9: Preview and Send the Invoice
Once the Invoice has been reviewed and finalized, preview it before sending it to the customer.
- Click Preview Invoice.
- Review the Invoice PDF.
- Verify the customer details, Items, pricing, taxes, and totals.
- Make any required corrections.
- Save and Send the Invoice to the customer.
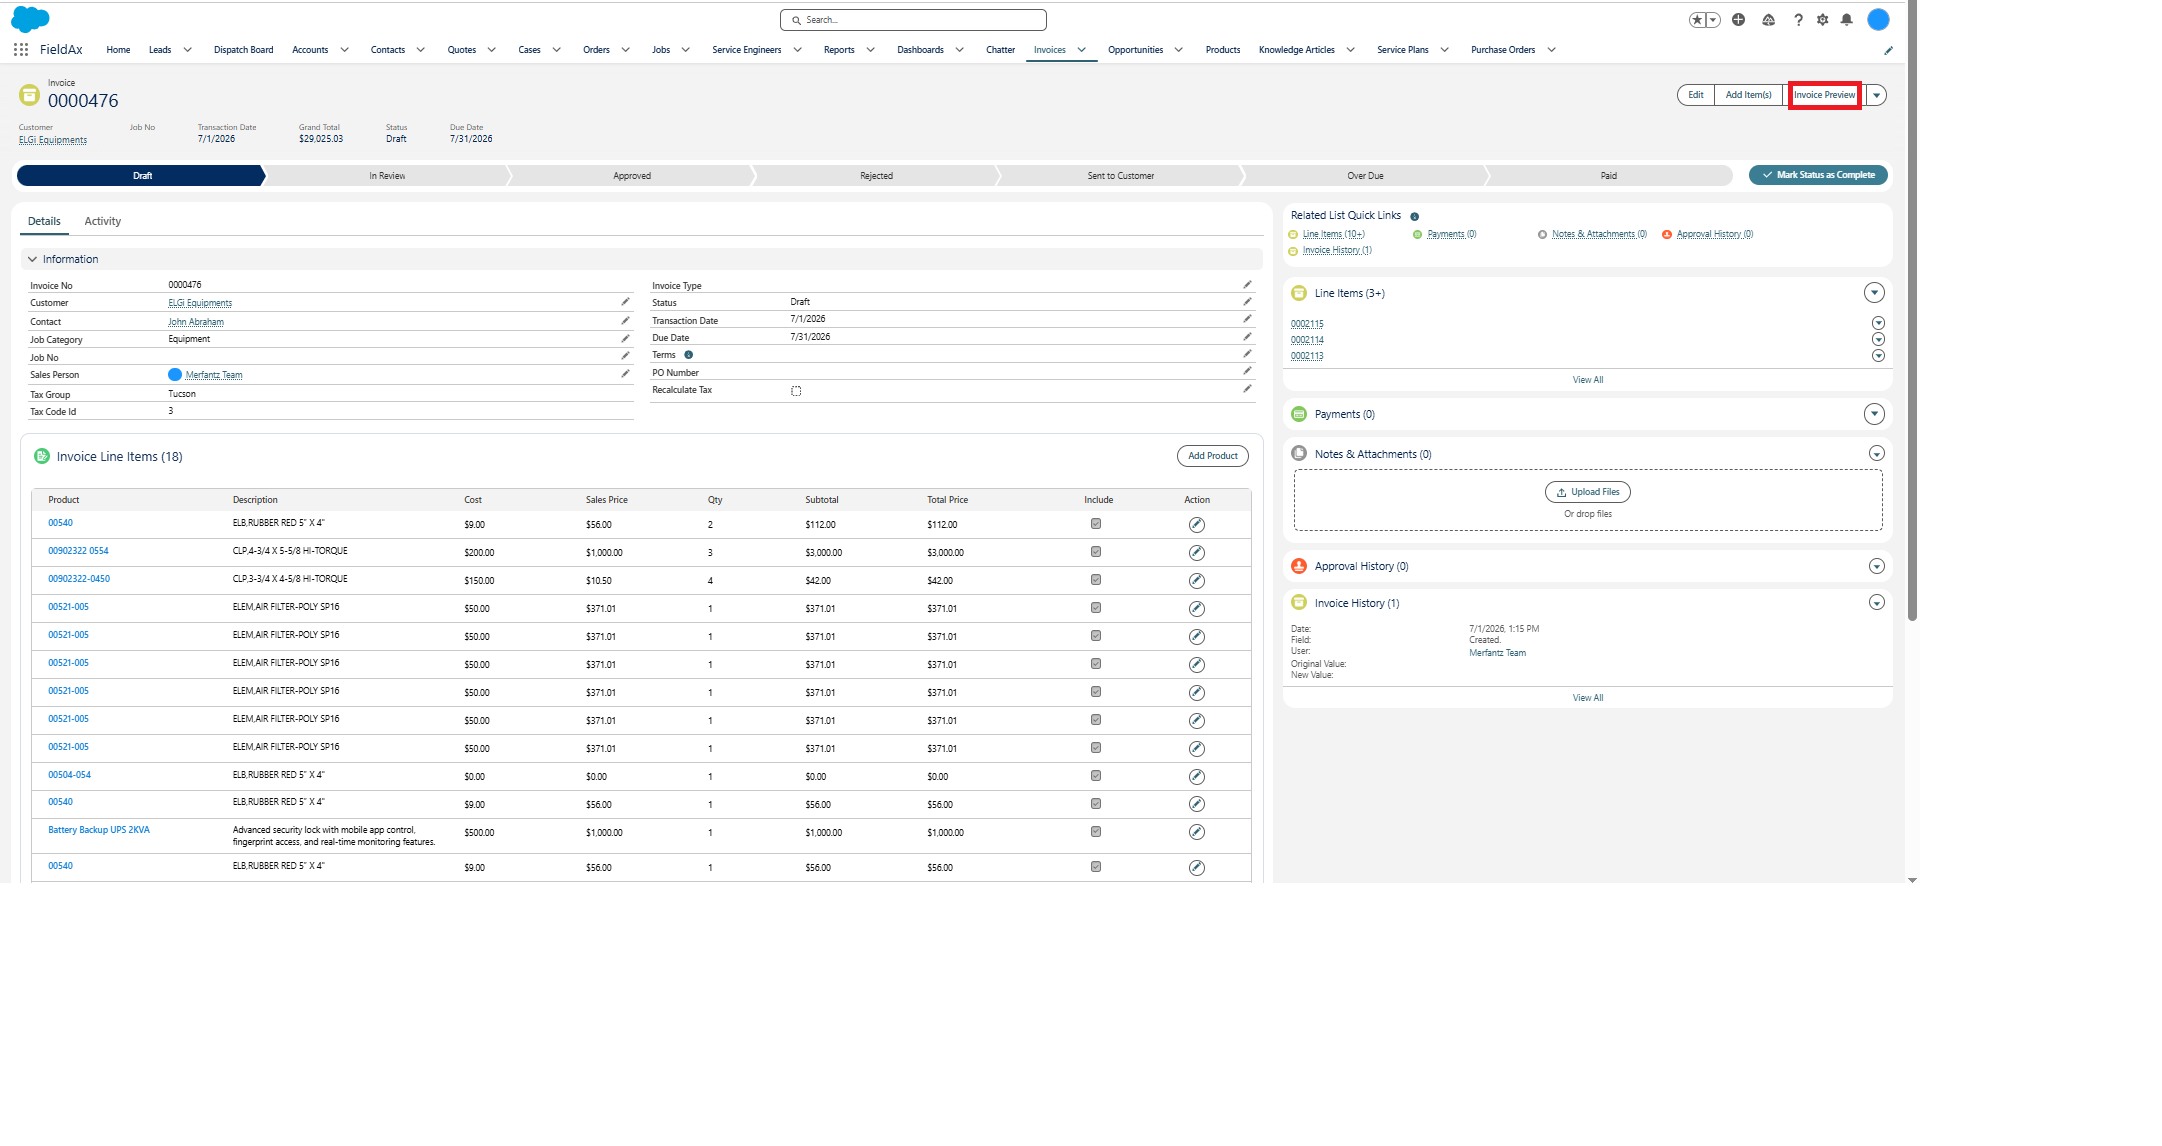
Invoice Preview.
Note: Always review the Invoice before sending it to the customer to ensure that the billing information is accurate.
Alternative: Create a Walk-In Parts Invoice
A Walk-In Parts Invoice can be used when a customer purchases parts directly without requiring a Job or Order.
This provides a quick way to bill the customer for parts without going through the standard Quote → Order → Job process.
Steps to Create a Walk-In Parts Invoice
- Go to the Invoices page.
- Click New.
- Select the Customer / Account.
- Set Job Category to Walk-In Parts.
- Complete the remaining required Invoice fields.
- Add the required Invoice Line Items.
- Click Save.
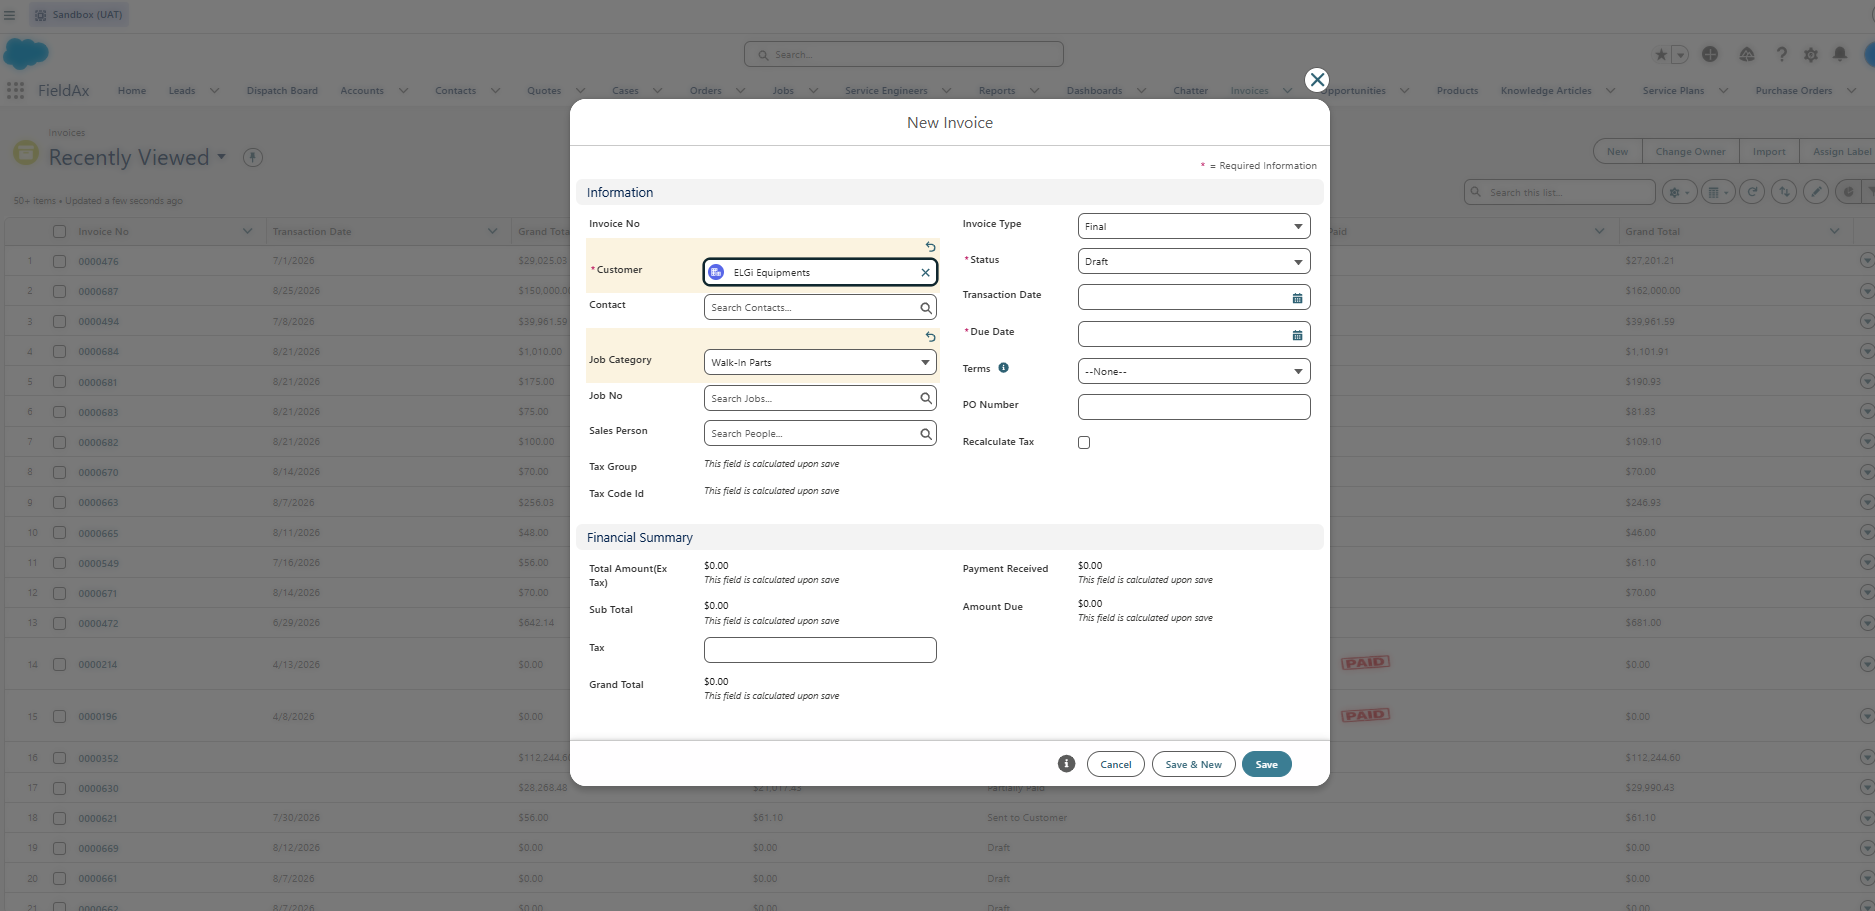
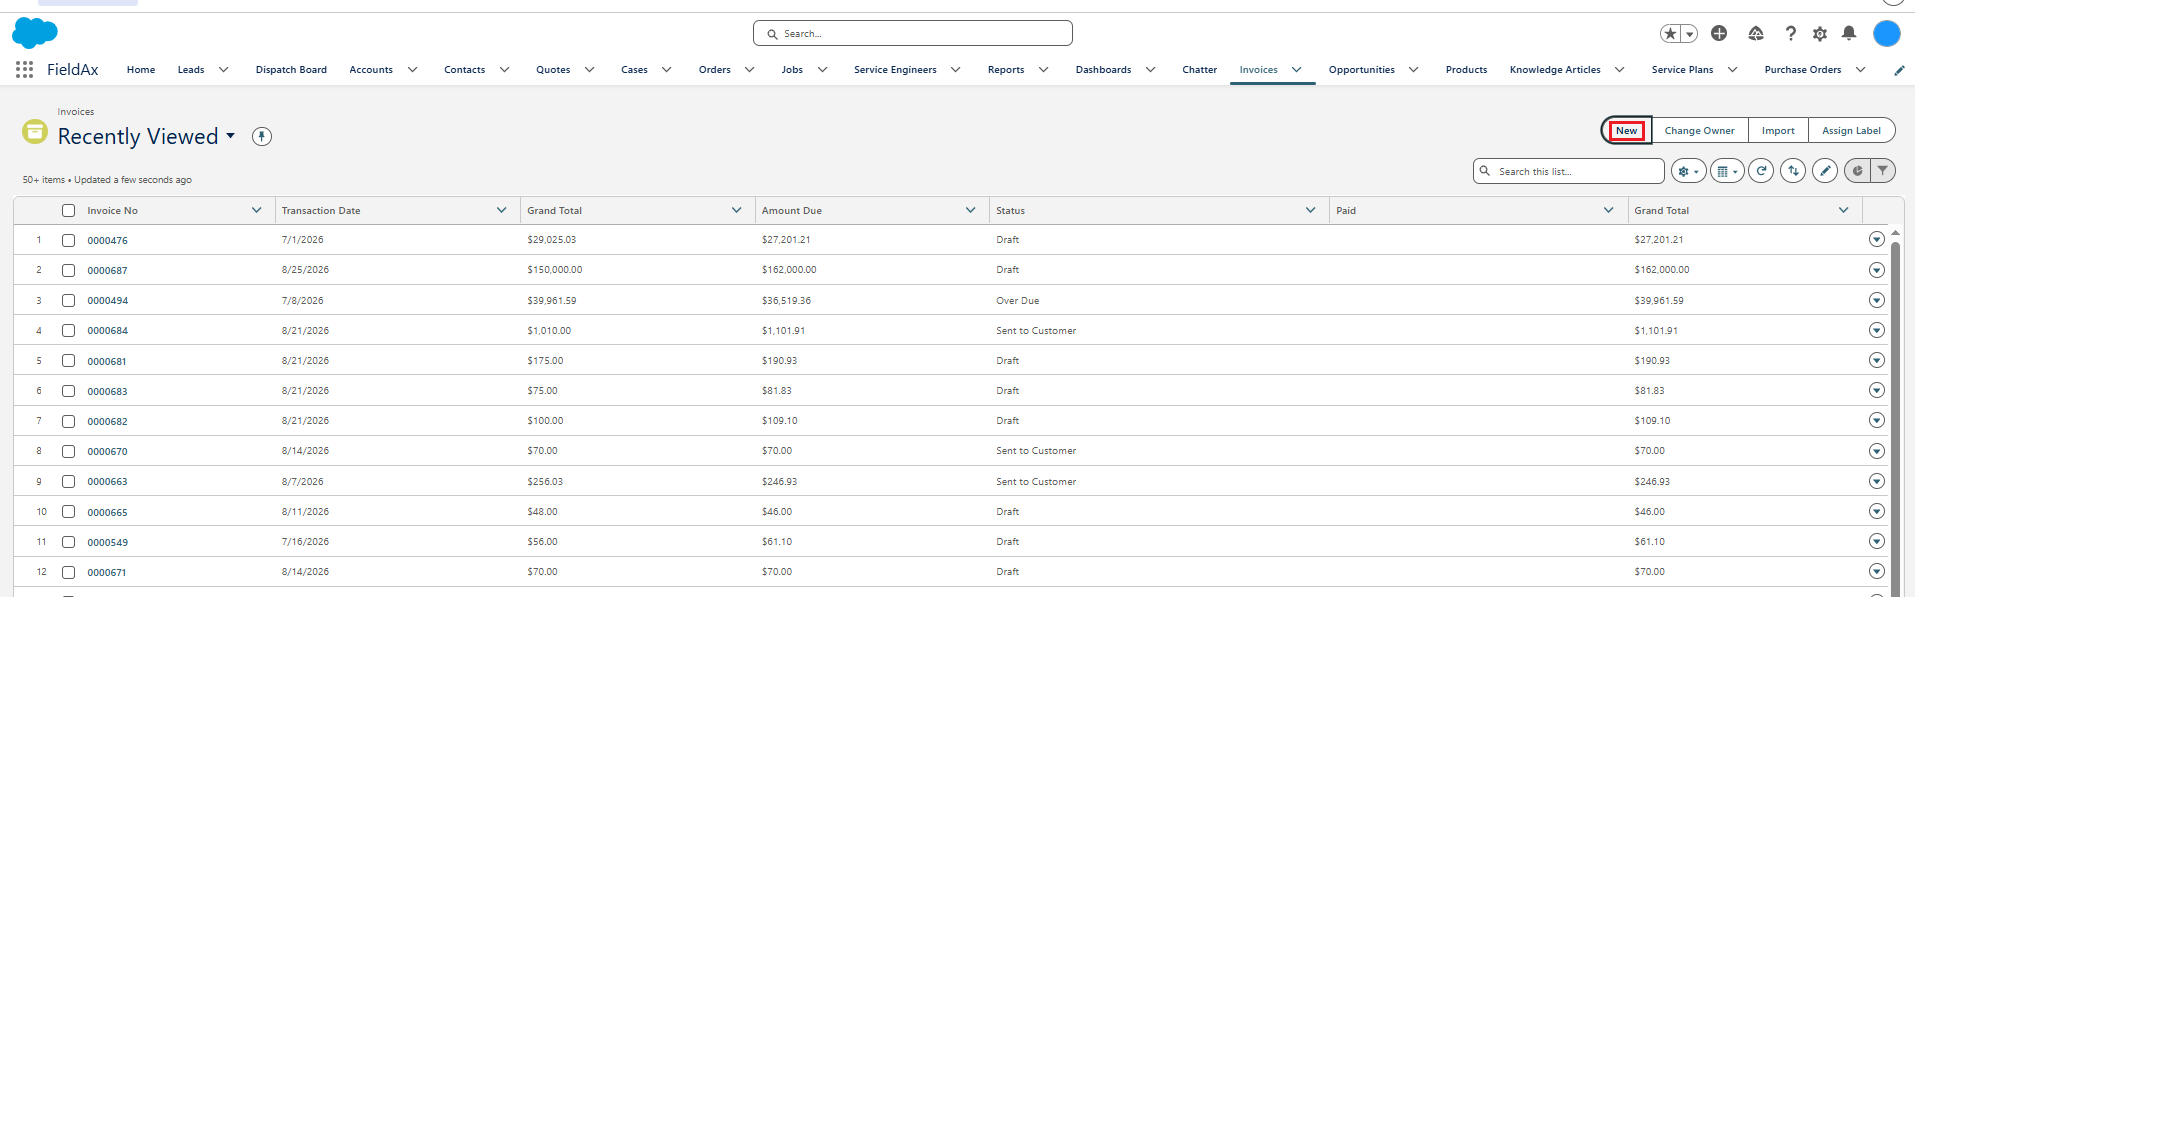
Creating a Walk-In Parts Invoice.
Once saved, the Invoice is created directly and can be reviewed, previewed, and sent to the customer.
Note: Use Walk-In Parts when the customer is purchasing parts without requiring a Job or Order.
Important Notes
- The Order is automatically created when the Quote is approved.
- The Order can be accessed from the Quote through Quick Links → Order.
- You do not need to manually create an Order as part of the standard Quote-to-Order process.
- Book Appointment is used to schedule the Job with a date, time, and Technician.
- The Technician accesses the Job using their own Technician account through the FieldAx mobile application.
- The Technician progresses through Accept → Enroute → Clock-In → Work → Debrief → Complete.
- Debrief is mandatory and must be completed before the Job can be completed.
- Technicians can add Items, attach photos, and complete the Service Report during the Job.
- When the Job is completed, the Invoice is automatically generated if Invoice Required is enabled.
- Set Invoice Required = False when an Invoice should not be generated for a particular Job.
- Create Invoice on the Order can be used when an Invoice needs to be generated directly from the Order.
- Review Invoice Line Items before sending the Invoice to the customer.
- Use Consolidated Invoice when multiple invoices need to be combined for the same Account.
- Use Walk-In Parts Invoice when parts are sold directly to a customer without a Job or Order.
Quick Reference: Order-to-Invoice Flow
| Stage | Action |
|---|---|
| Quote Approved | Approve the Quote. The Opportunity becomes Closed Won and the Order is created automatically. |
| Job Creation | Create the Job from the approved Quote. |
| Job Scheduling | Assign the Technician, date, and time. |
| Open Order | Return to the Quote and open the automatically created Order through Quick Links → Order. |
| Book Appointment | Schedule the Job from the Order. |
| Technician Login | Technician logs in using their own FieldAx Technician account on the mobile application. |
| Job Started | Technician progresses through Accept → Enroute → Clock-In → Work. |
| Debrief | Technician completes the mandatory Debrief. |
| Job Completion | Technician completes the Job after completing the required Debrief. |
| Invoice Generation | Invoice is generated automatically when Invoice Required is enabled. |
| Invoice Review | Review and update Invoice details and Invoice Line Items. |
| Preview & Send | Preview the Invoice and send it to the customer. |
| Consolidated Invoice | Combine multiple invoices for the same Account when required. |
| Walk-In Parts Invoice | Create an Invoice directly for parts sold without a Job or Order. |
Quick Reference: Creating Records Manually
Most records in the standard Quote-to-Invoice process are created automatically. If you ever need to create a record manually, use the following navigation:
| Record | How to Create It Manually |
|---|---|
| Account | Go to the Accounts tab and click New. |
| Contact | Go to the Contacts tab and click New. |
| Quote | Use the Create Quote button from an Account record. |
| Opportunity | Go to the Opportunities tab and click New. |
| Case | Go to the Cases tab and click New. |
| Order | Go to the Orders tab and click New if manual creation is required. |
| Job | Go to the Jobs tab and click New. |
| Invoice | Go to the Invoices tab and click New. |
Related Articles
- Create an Account: Learn how to create a Customer Account in FieldAx.
- Create a Contact: Learn how to add a Contact to an existing Account.
- Quote to Job: Run the Full Quote Process: Learn how to create, review, approve, and proceed from Quote to Order and Job.
- Quote Line Items: Learn how to add and manage products, quantities, costs, and prices on a Quote.
- Product Search: Learn how to find the required products while creating a Quote.