
5 mins read
Overview
This article explains how to create an Agreement and add a Service Plan for a customer.
The process includes creating the Agreement, adding the Service Plan, selecting the service dates and equipment, and adding the parts. After creating the Service Plan, use the Schedule Now button from the Account page to create a Job for the service. Use the Skip button to change the next service date when the current service needs to be skipped.
1. Process at a Glance
- Open the customer Account and locate the Agreements & Service Plans section.
- Create a new Agreement and enter the required agreement information.
- Save the Agreement and open the Agreement record.
- Add a Maintenance Schedule / Service Plan.
- Select the Service Type and define the start, end, and next service dates.
- Select the equipment/installed system covered by the plan.
- Enter notes and configure non-billable and billable/service parts as required.
- Save the Service Plan and verify that it appears under the Agreement.
- When the Next Service Date is reached, the system automatically creates the Job and its associated Job Item.
- Use the Schedule button when a Job needs to be created for the service.
- Use the Skip button when the current service needs to be skipped and the next service date needs to be updated.
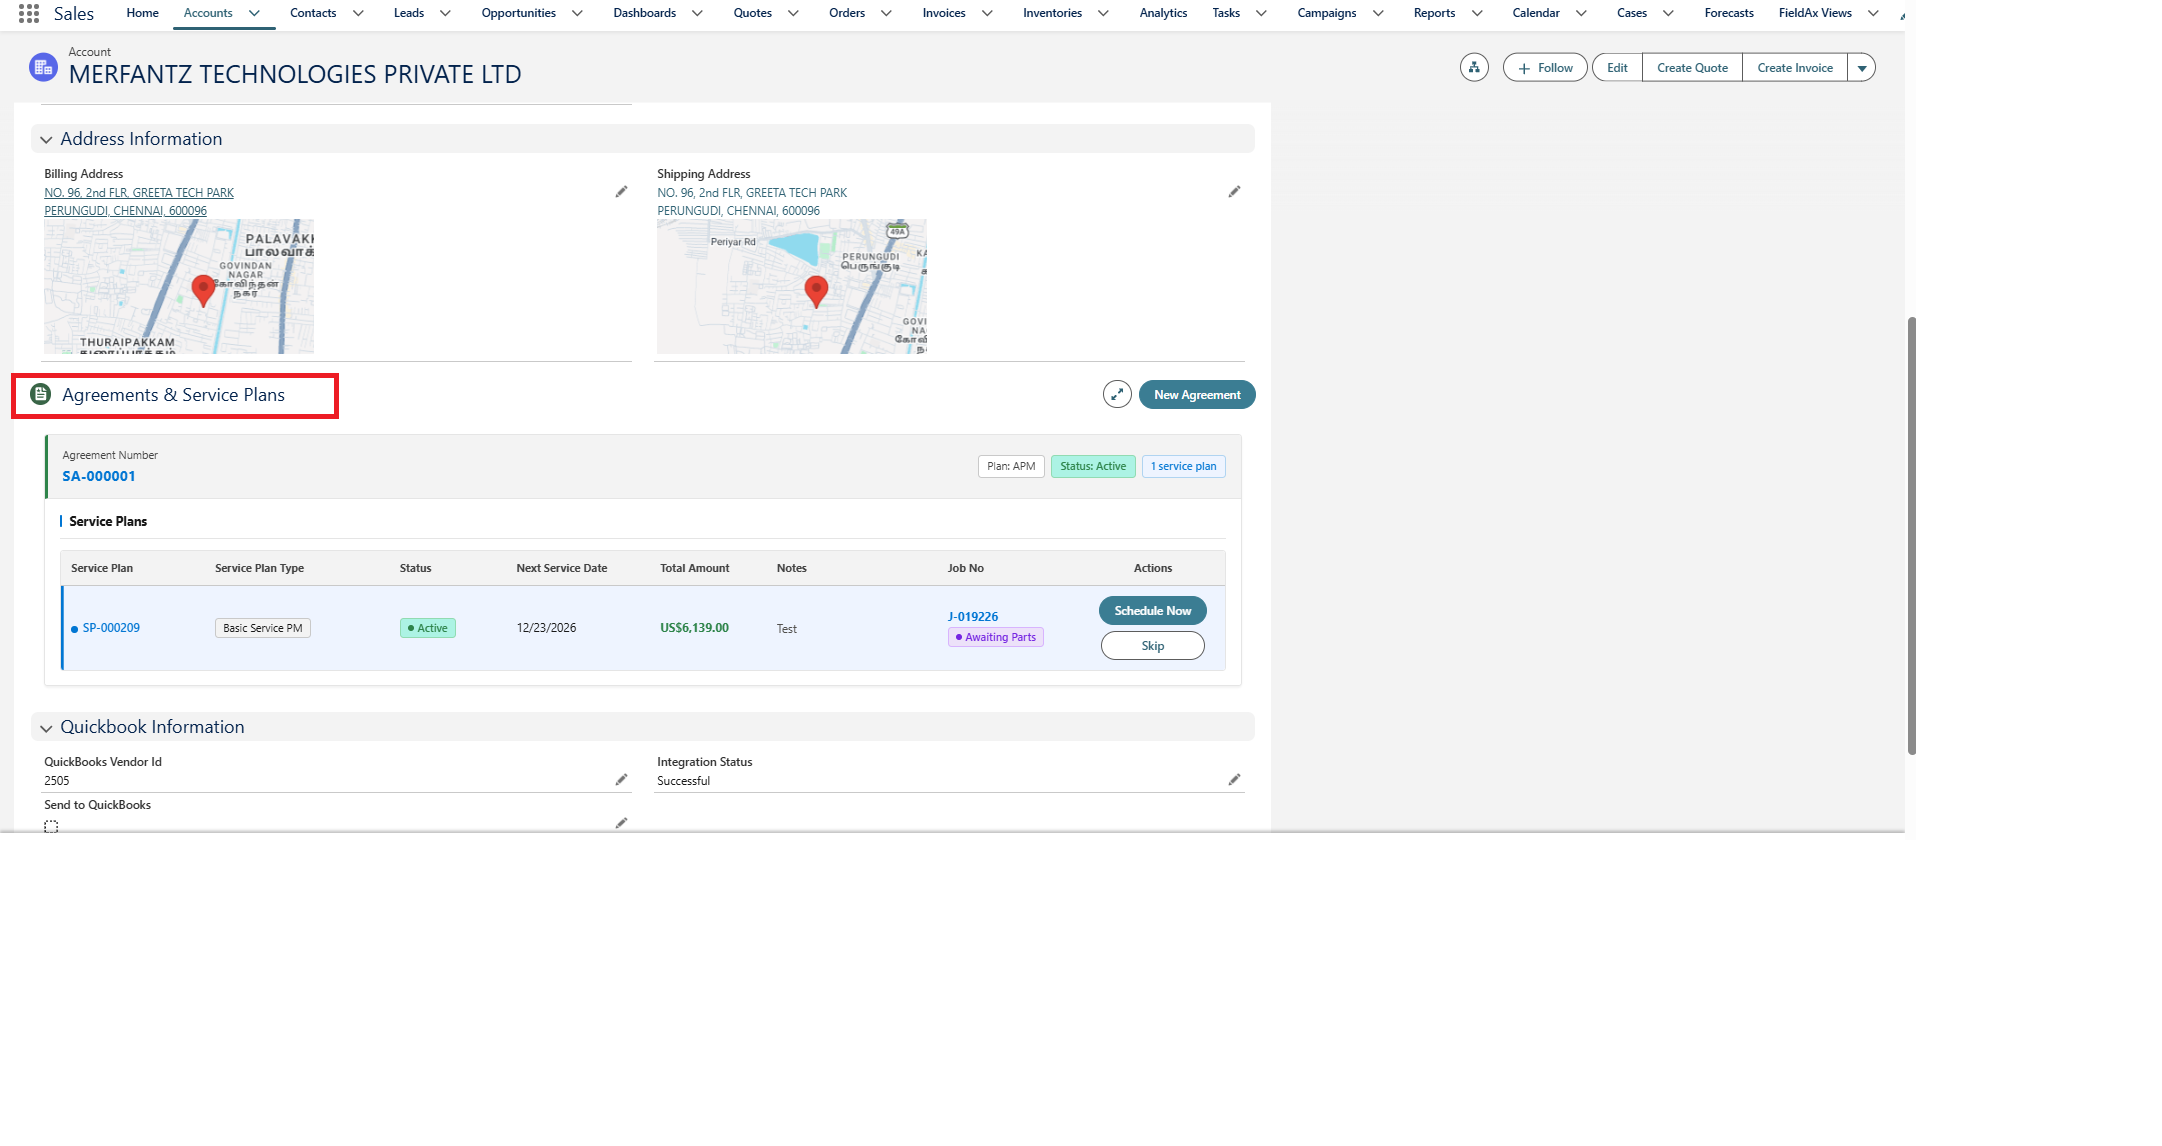
Agreement & Service Plans from Account Page
2. Create a New Agreement
Start from the customer’s Account record. In the Agreements & Service Plans section, select New Agreement to open the Agreement creation form.
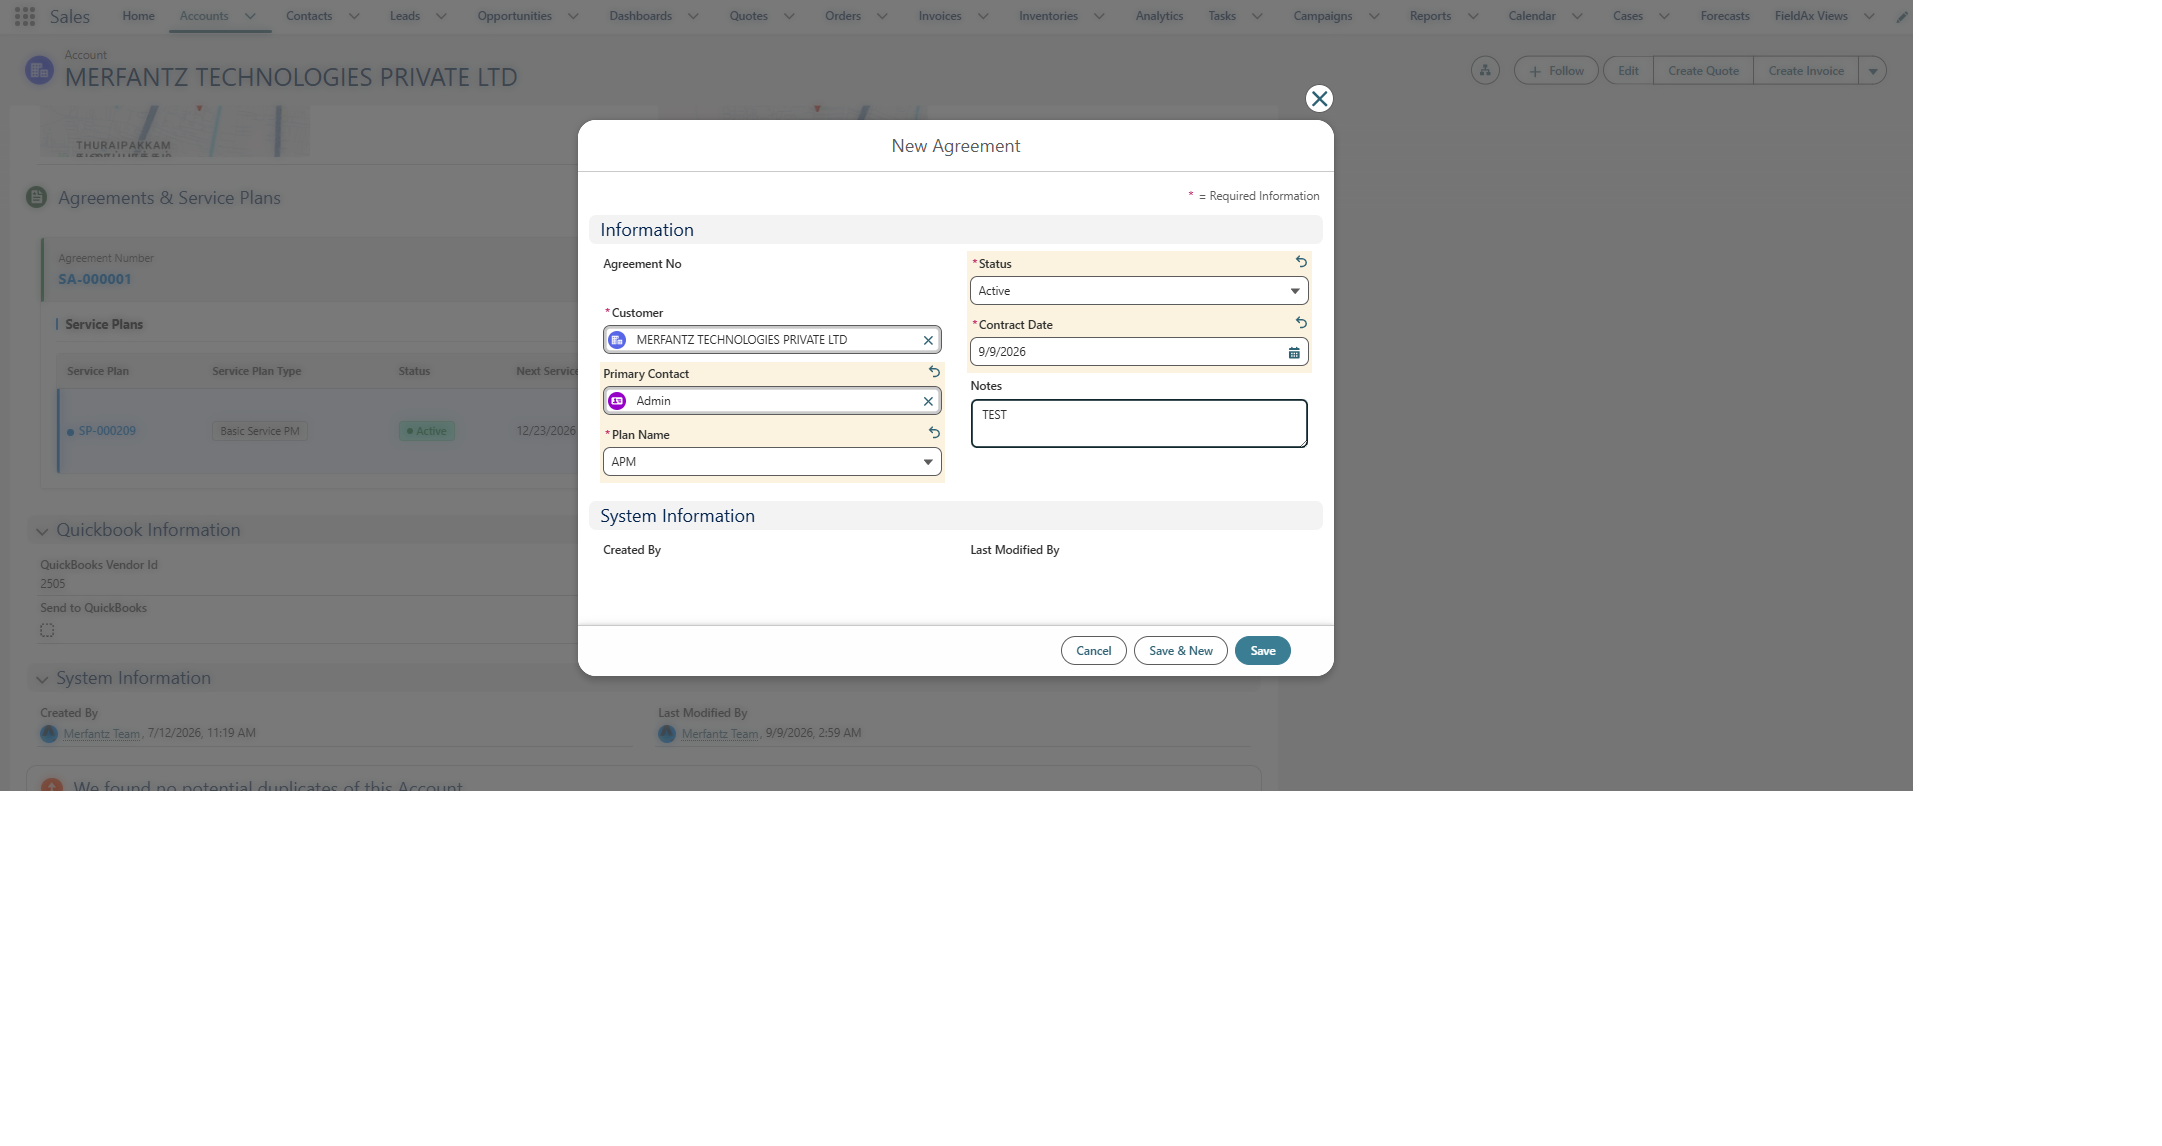
Create New Agreement
3. Enter Agreement Information
- Agreement No — The agreement number is generated/displayed by the system in the demonstrated flow.
- Customer — Select the customer Account for whom the agreement is being created.
- Primary Contact — Select the main customer contact associated with the agreement, when applicable.
- Plan Name — Select the applicable service plan name (for example, APM in the demonstration).
- Status — Set the Agreement status. The demonstration uses Active.
- Contract Date — Enter the date on which the agreement/contract begins.
- Notes — Add any relevant agreement-level information or comments.
4. Save the Agreement
Review the required fields and select Save. The system creates the Agreement record and opens the Agreement detail page.
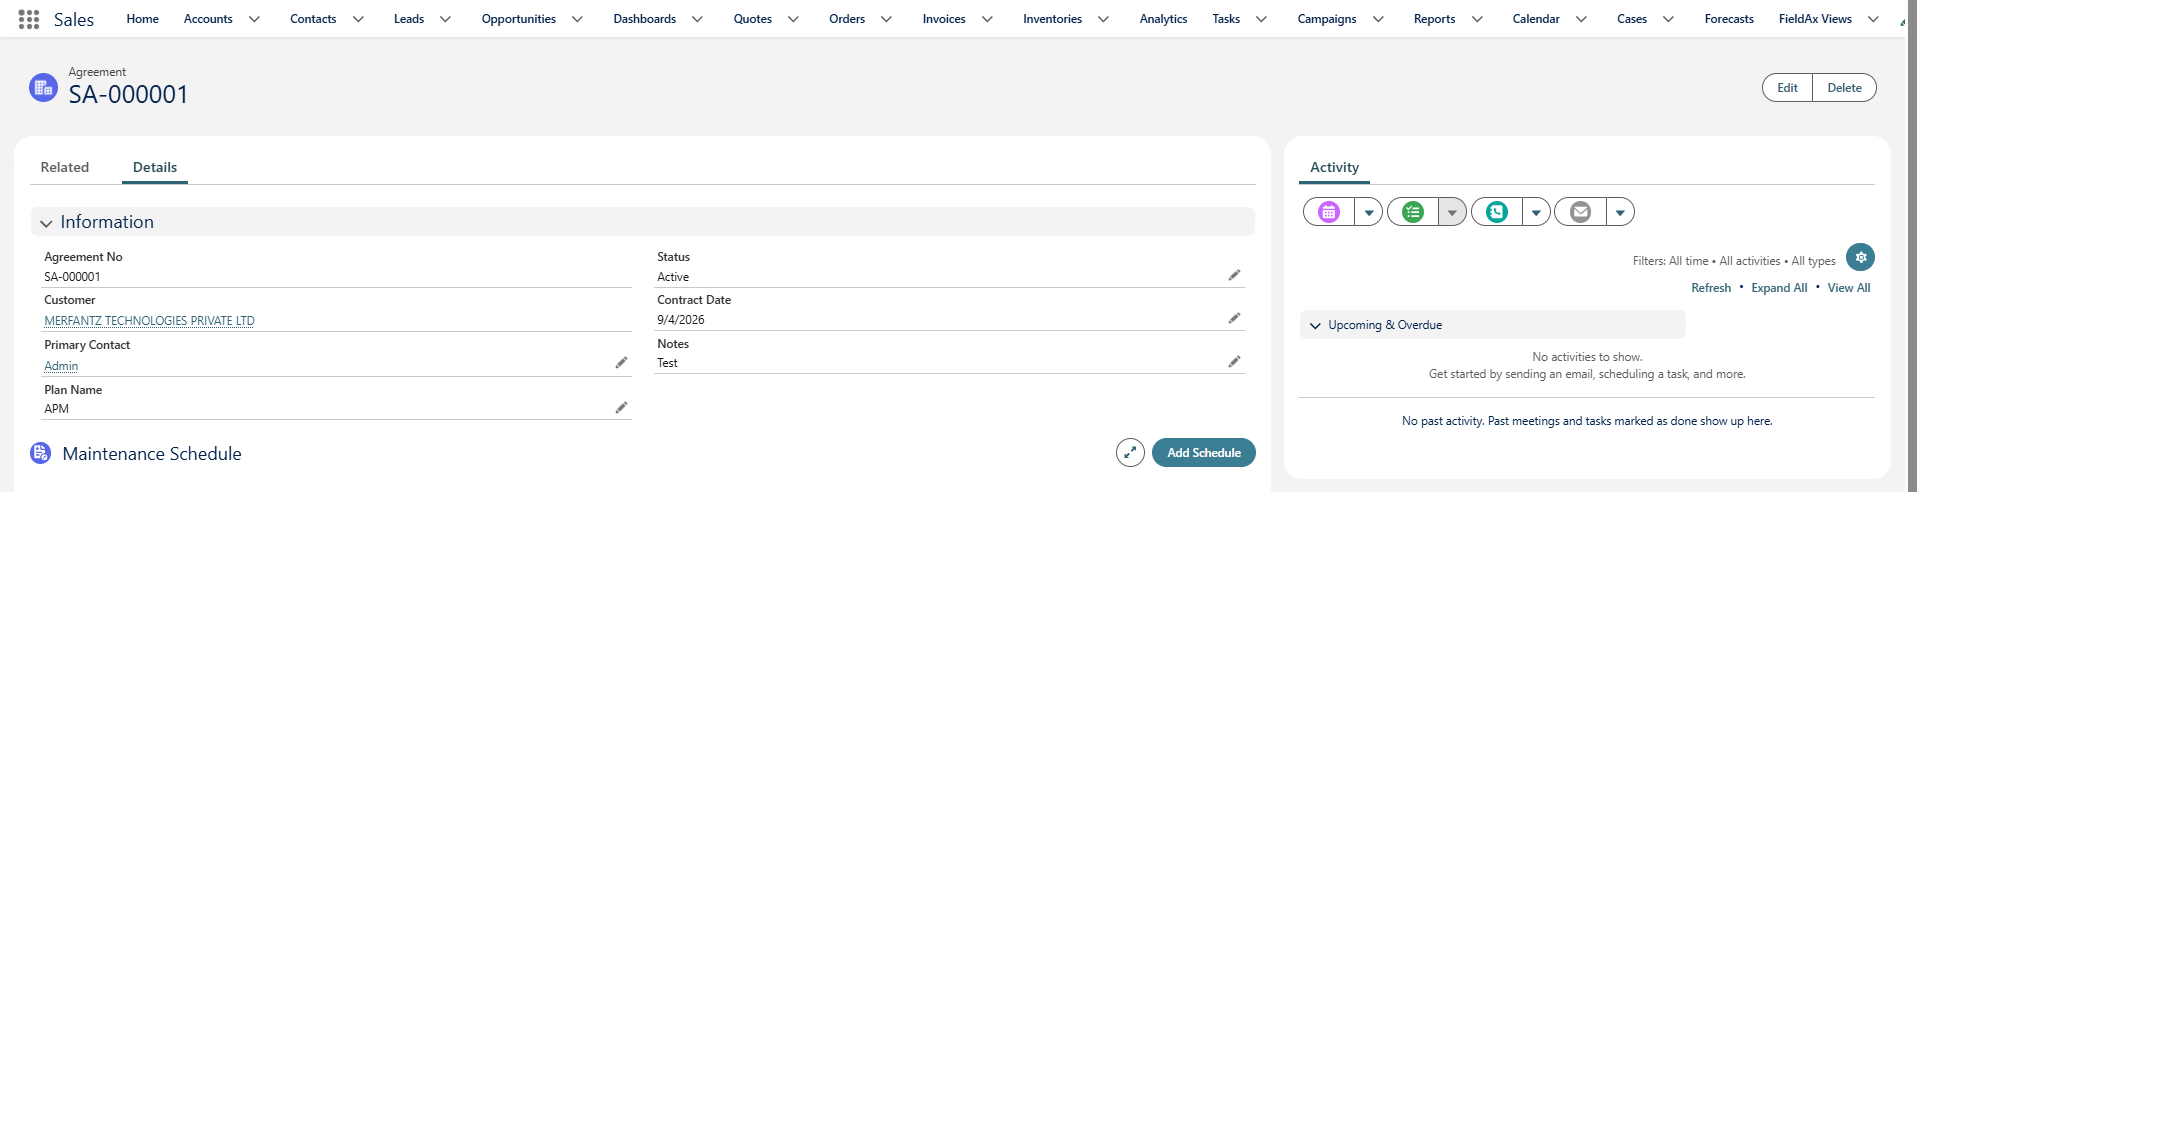
Service Agreement record Page
5. Add a Maintenance Schedule / Service Plan
After the Agreement is created, use Add Schedule in the Maintenance Schedule section to create the Service Plan linked to the Agreement.
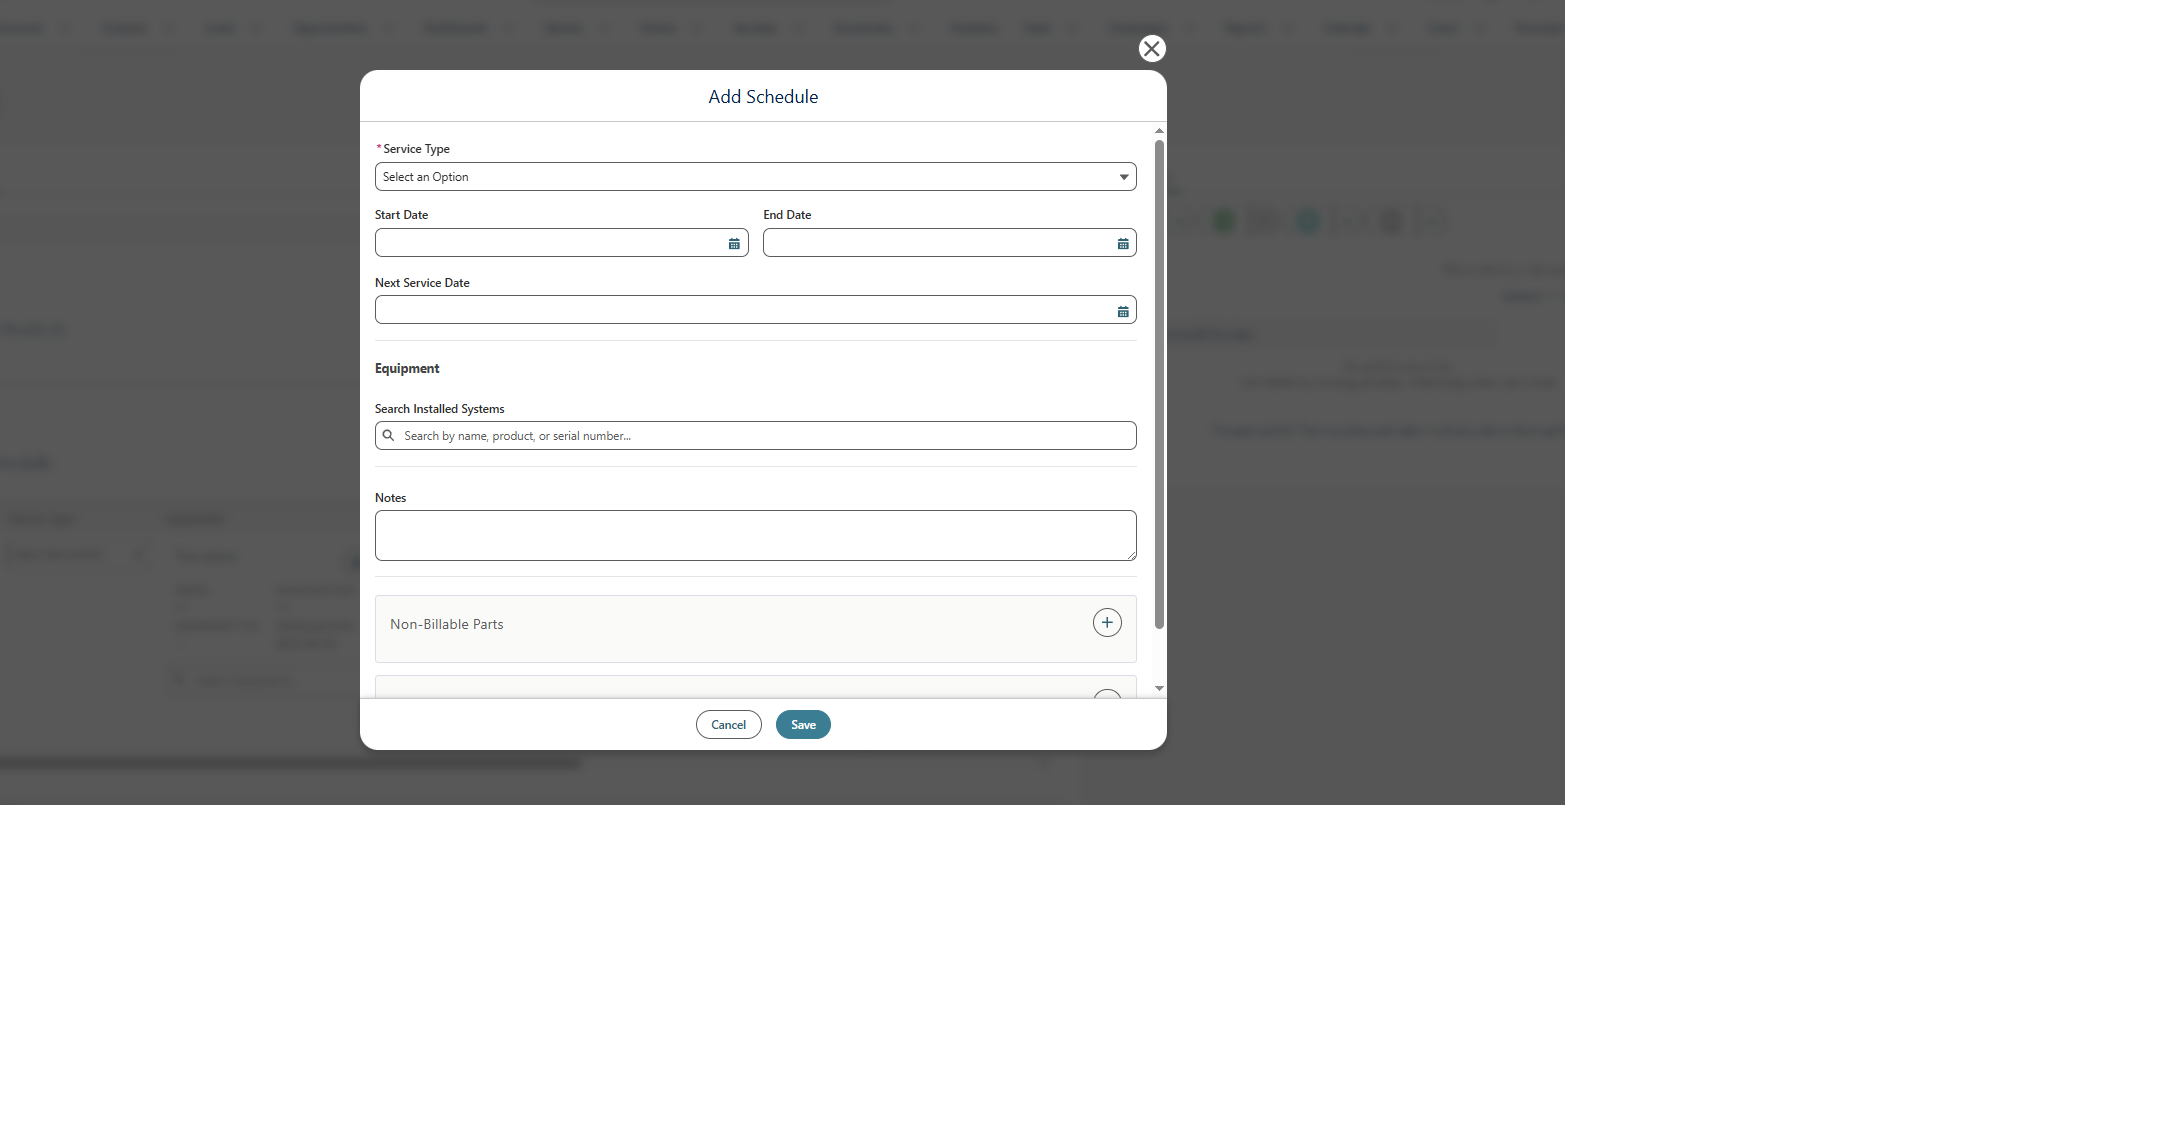
Determine Service Schedule
6. Define the Service Schedule
- Service Type — Select the type of service to be performed. The demonstration uses Basic Service PM.
- Start Date — Enter the date from which the Service Plan becomes applicable.
- End Date — Enter the date through which the Service Plan remains active.
- Next Service Date — Enter the next planned service date. This date is used to identify when the next service job need to be created.
- Equipment — Search for and select the installed system/equipment covered by this Service Plan. The search can use equipment name.
- Notes — Add service-plan-specific instructions or comments.
7. Configure Service Plan Parts
The Service Plan can include parts that are required for the planned maintenance. The demonstrated screen separates parts into non-billable and billable/service parts.
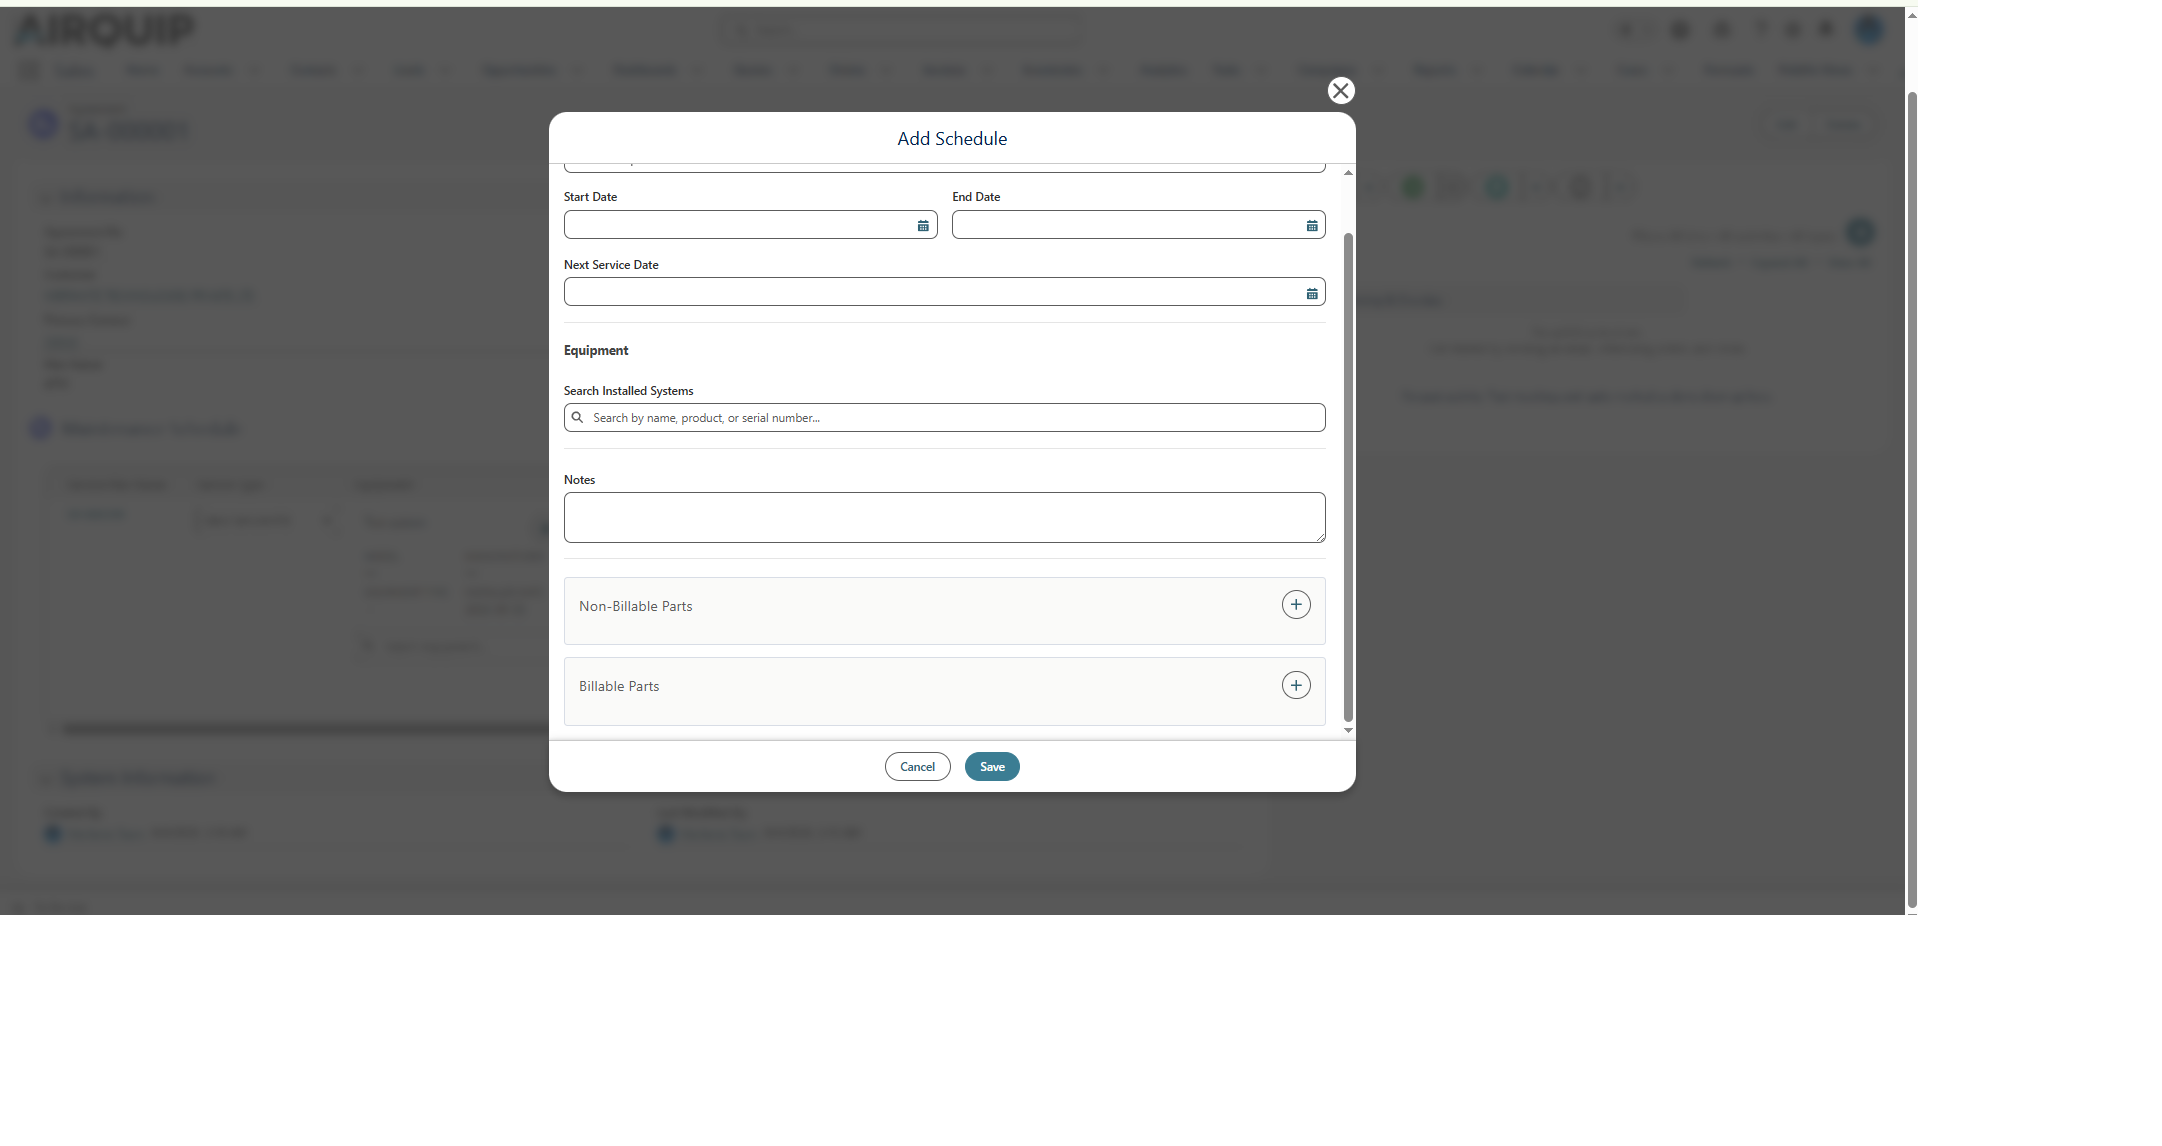
Add parts to Service Plan
8. Add Non-Billable Parts
- Select the + icon in the Non-Billable Parts section.
- Search for and select the required Product.
- Review or enter the Cost.
- Enter the Sales Price, where applicable to the Service Plan configuration.
- Enter the required Quantity.
- Use the delete icon on a part row if an added part needs to be removed.
Non-billable parts are maintained separately from billable/service parts so that the service plan can distinguish parts included in the maintenance arrangement from parts that may be charged to the customer.
9. Add Billable / Service Parts
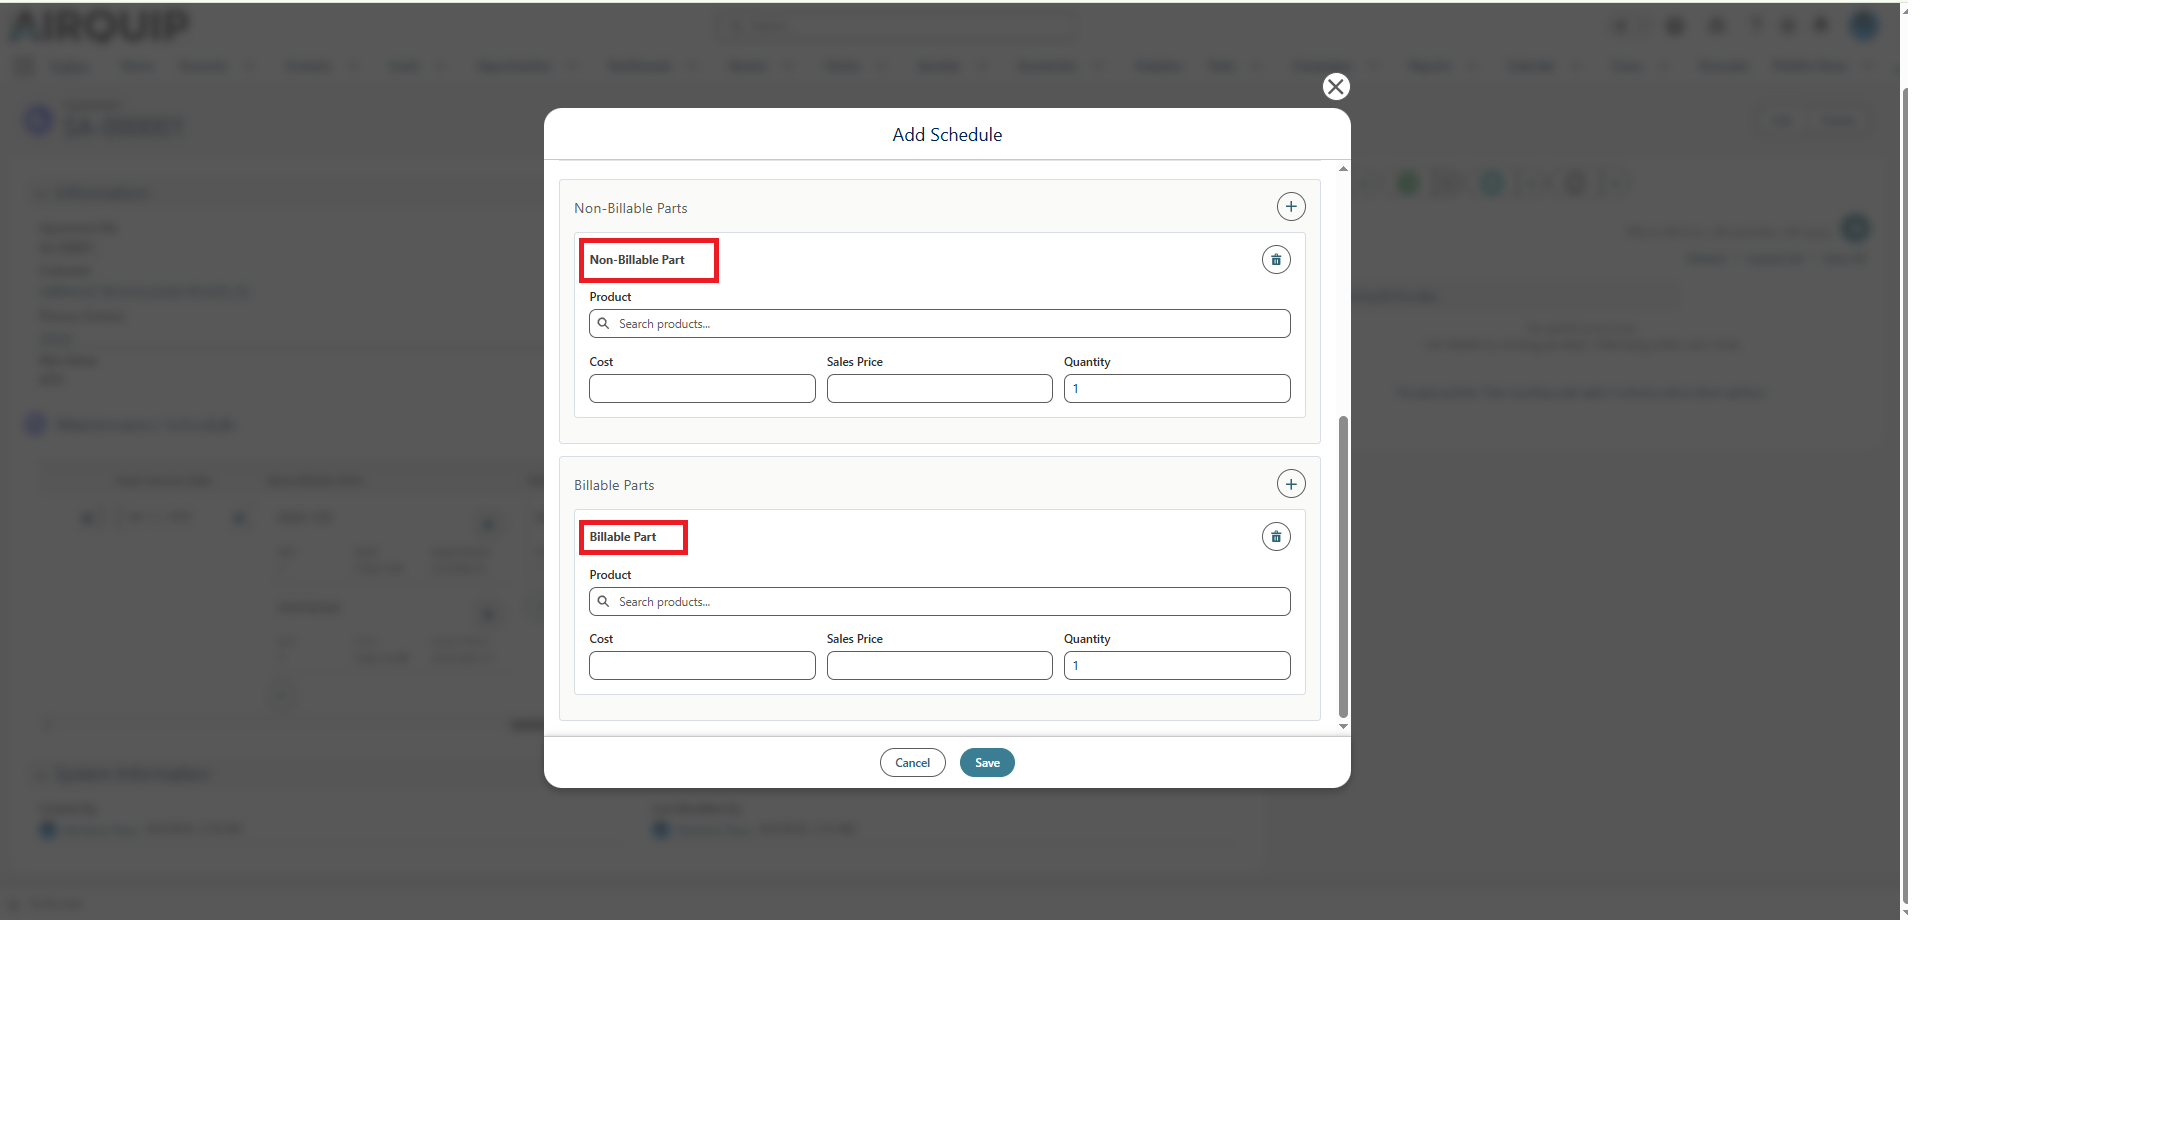
Billable & Non-Billable Parts
- Use the + icon in the Billable Parts / Service Parts section.
- Search for and select the Product.
- Confirm the Cost and Sales Price.
- Enter the Quantity required for the service.
- Select Billable when the part should be treated as a billable service-plan item.
- Select Save to add the part to the Service Plan.
10. Save and Verify the Service Plan
After entering the schedule, equipment, notes, and parts, select Save. A success message confirms that the Service Plan was created successfully.
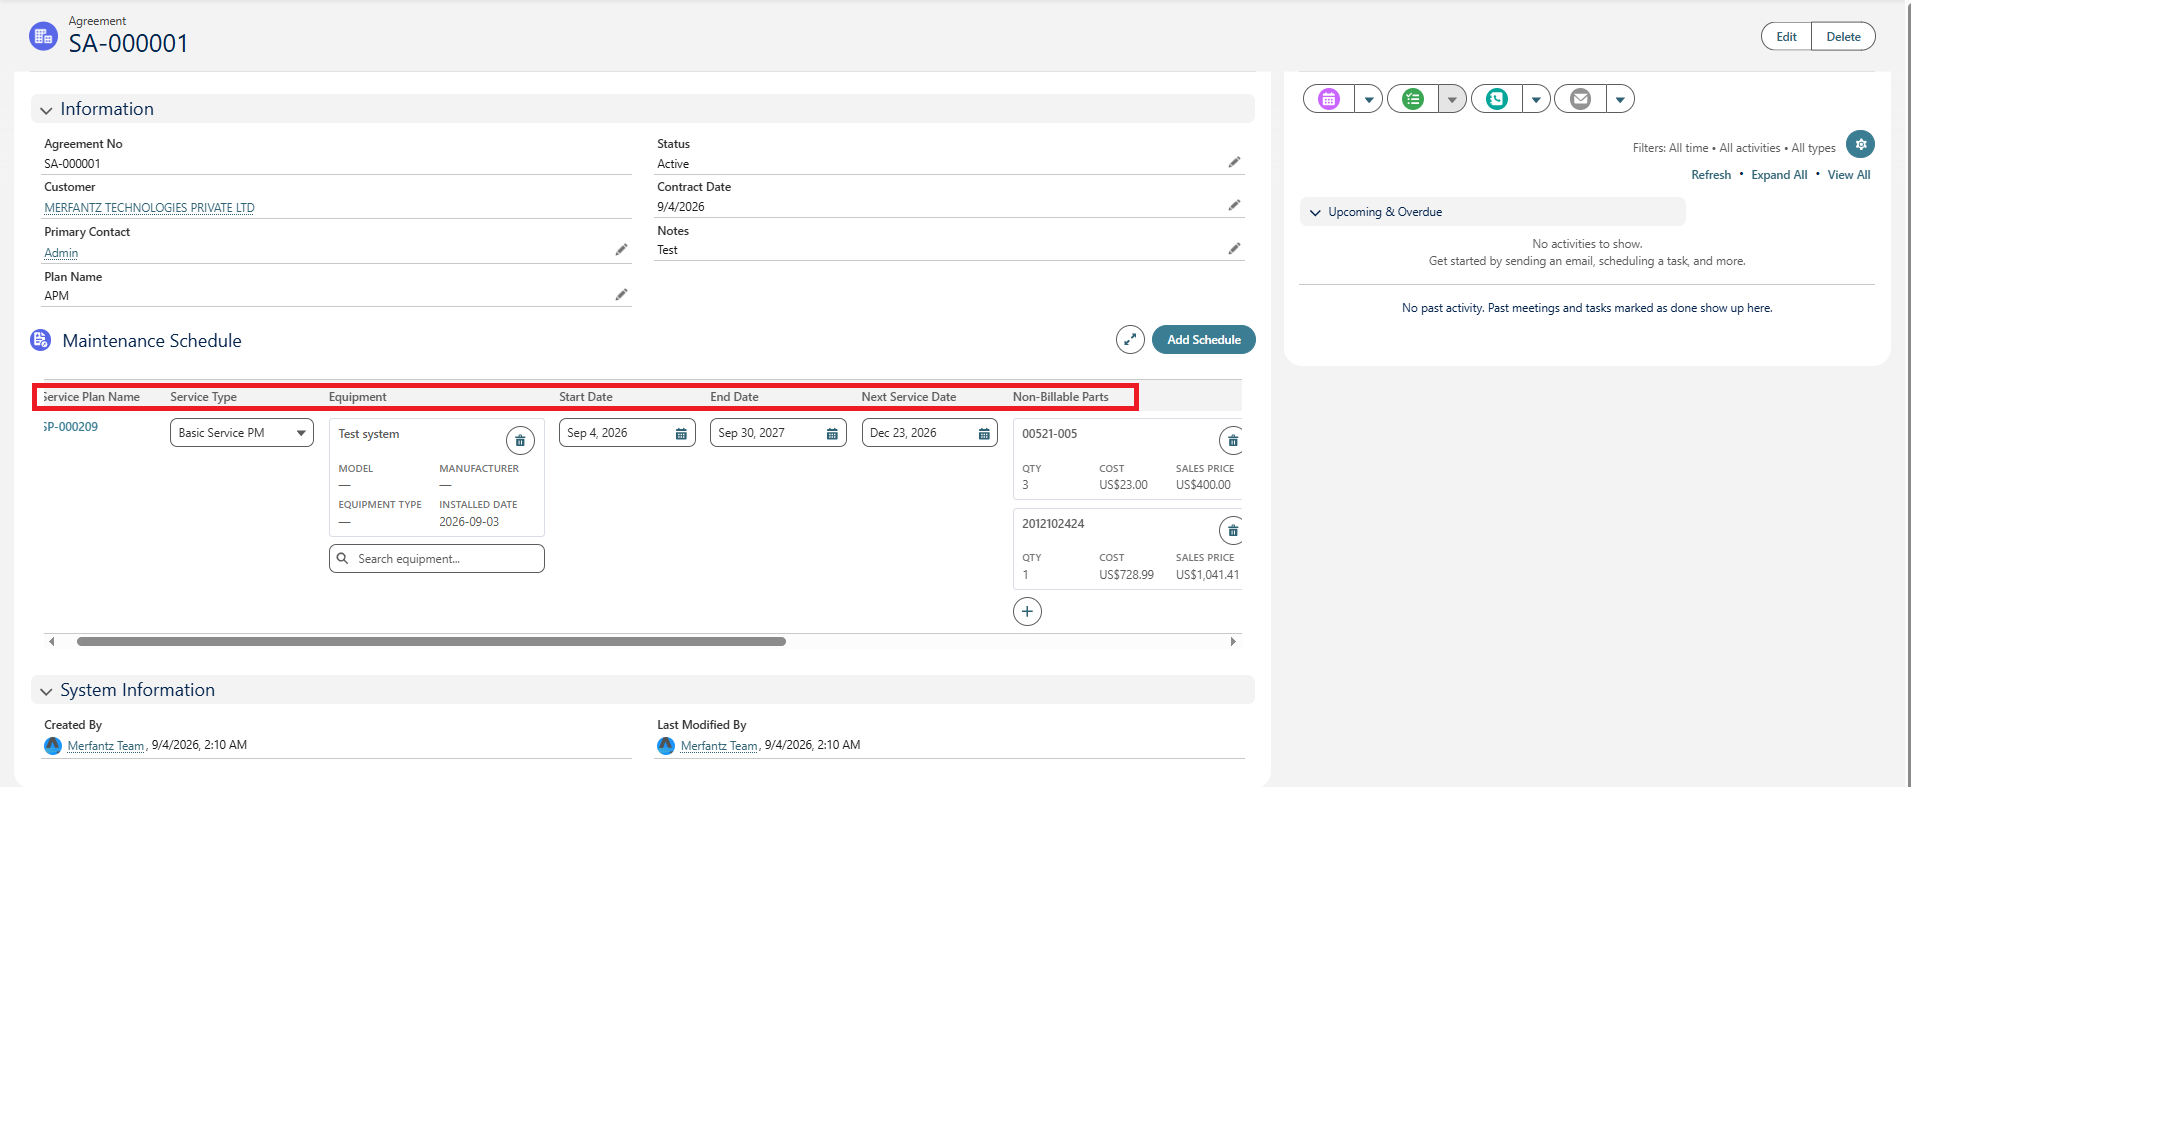
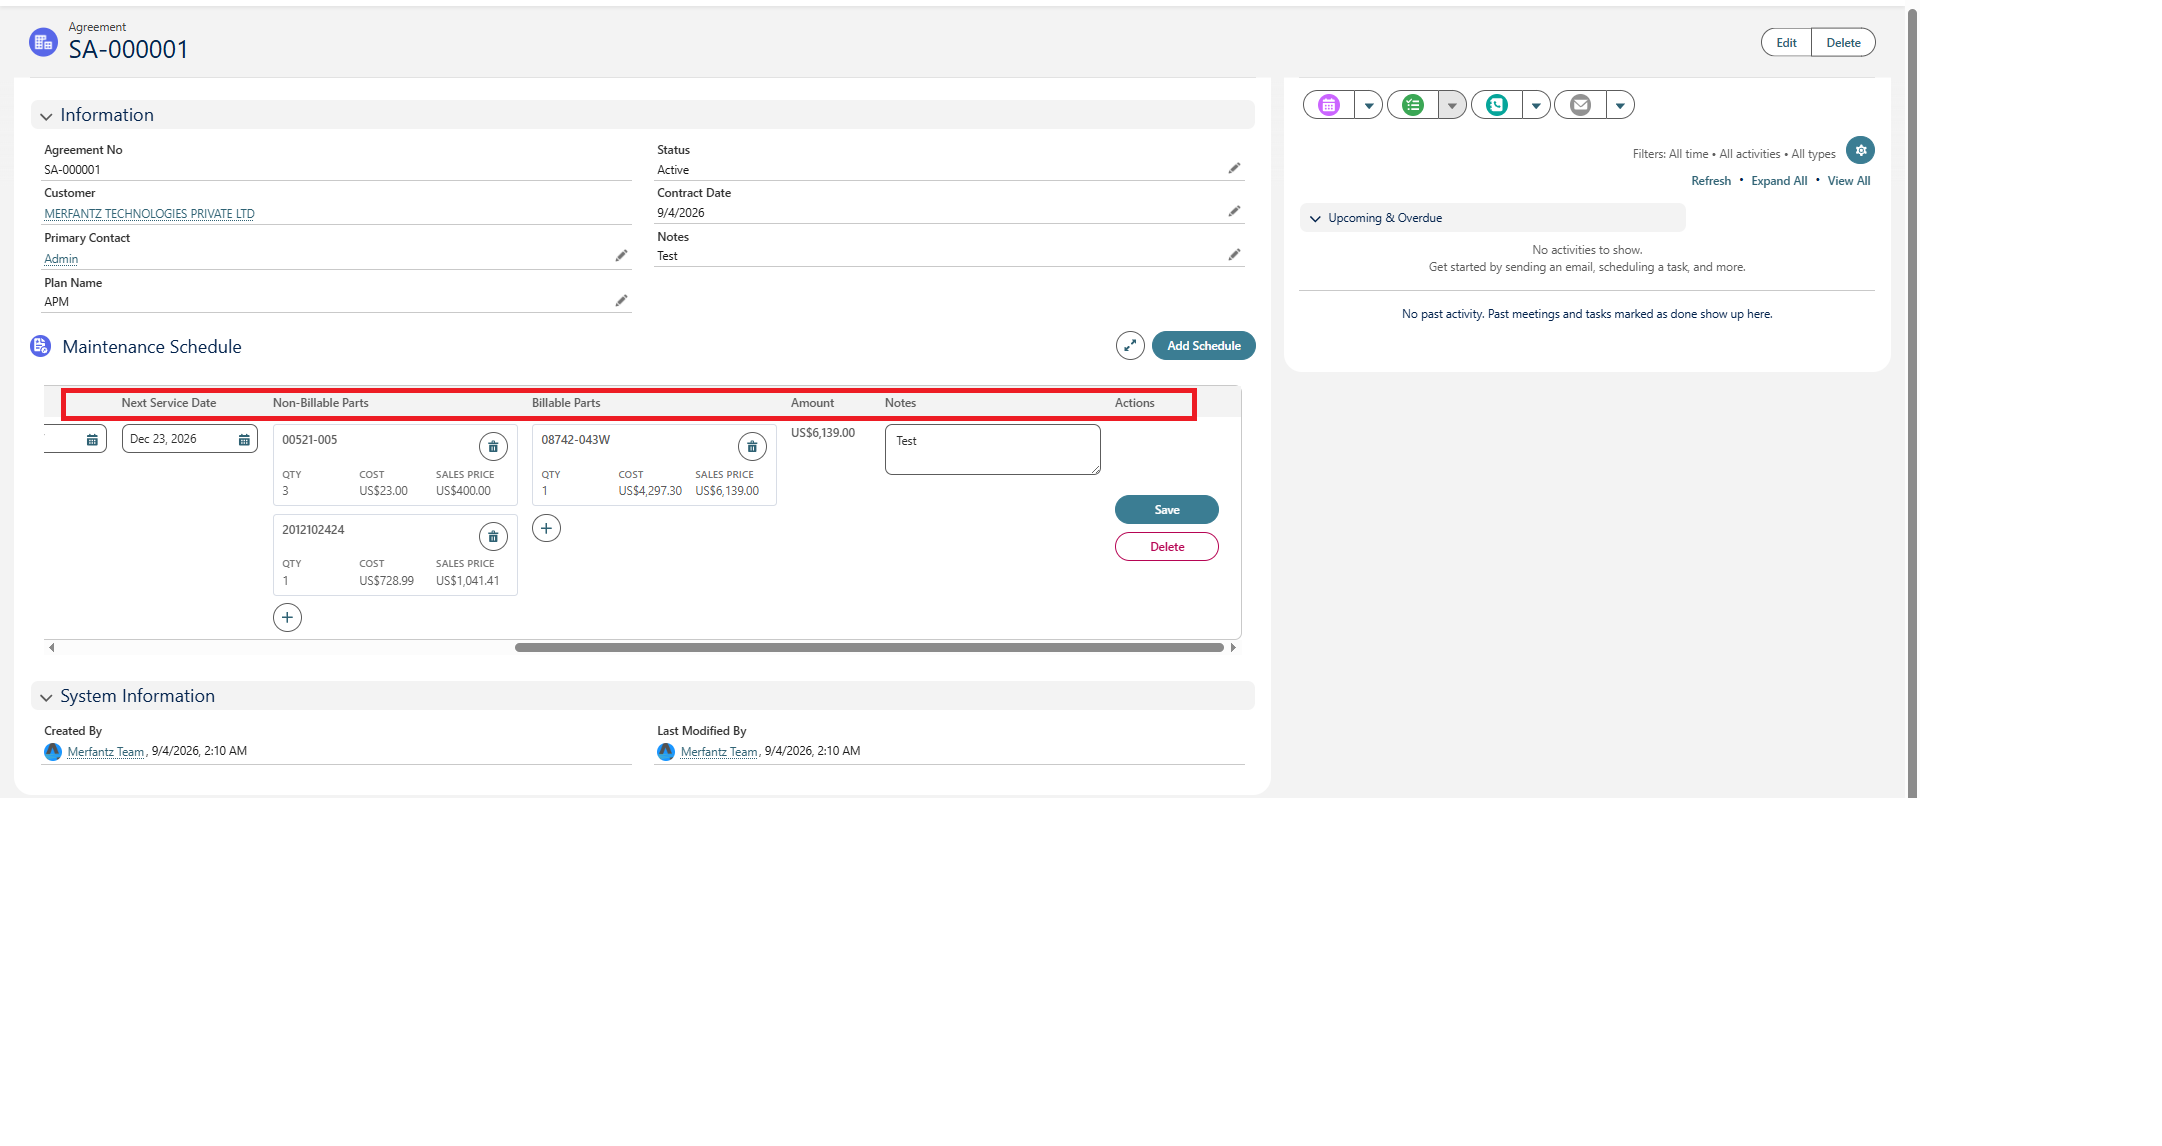
Created service Plan record
The Service Plan appears within the Agreement’s Maintenance Schedule. The row provides a summary such as the Service Plan Name, Service Type, Equipment, Start Date, End Date, and Next Service Date.
11. Verify from the Customer Account
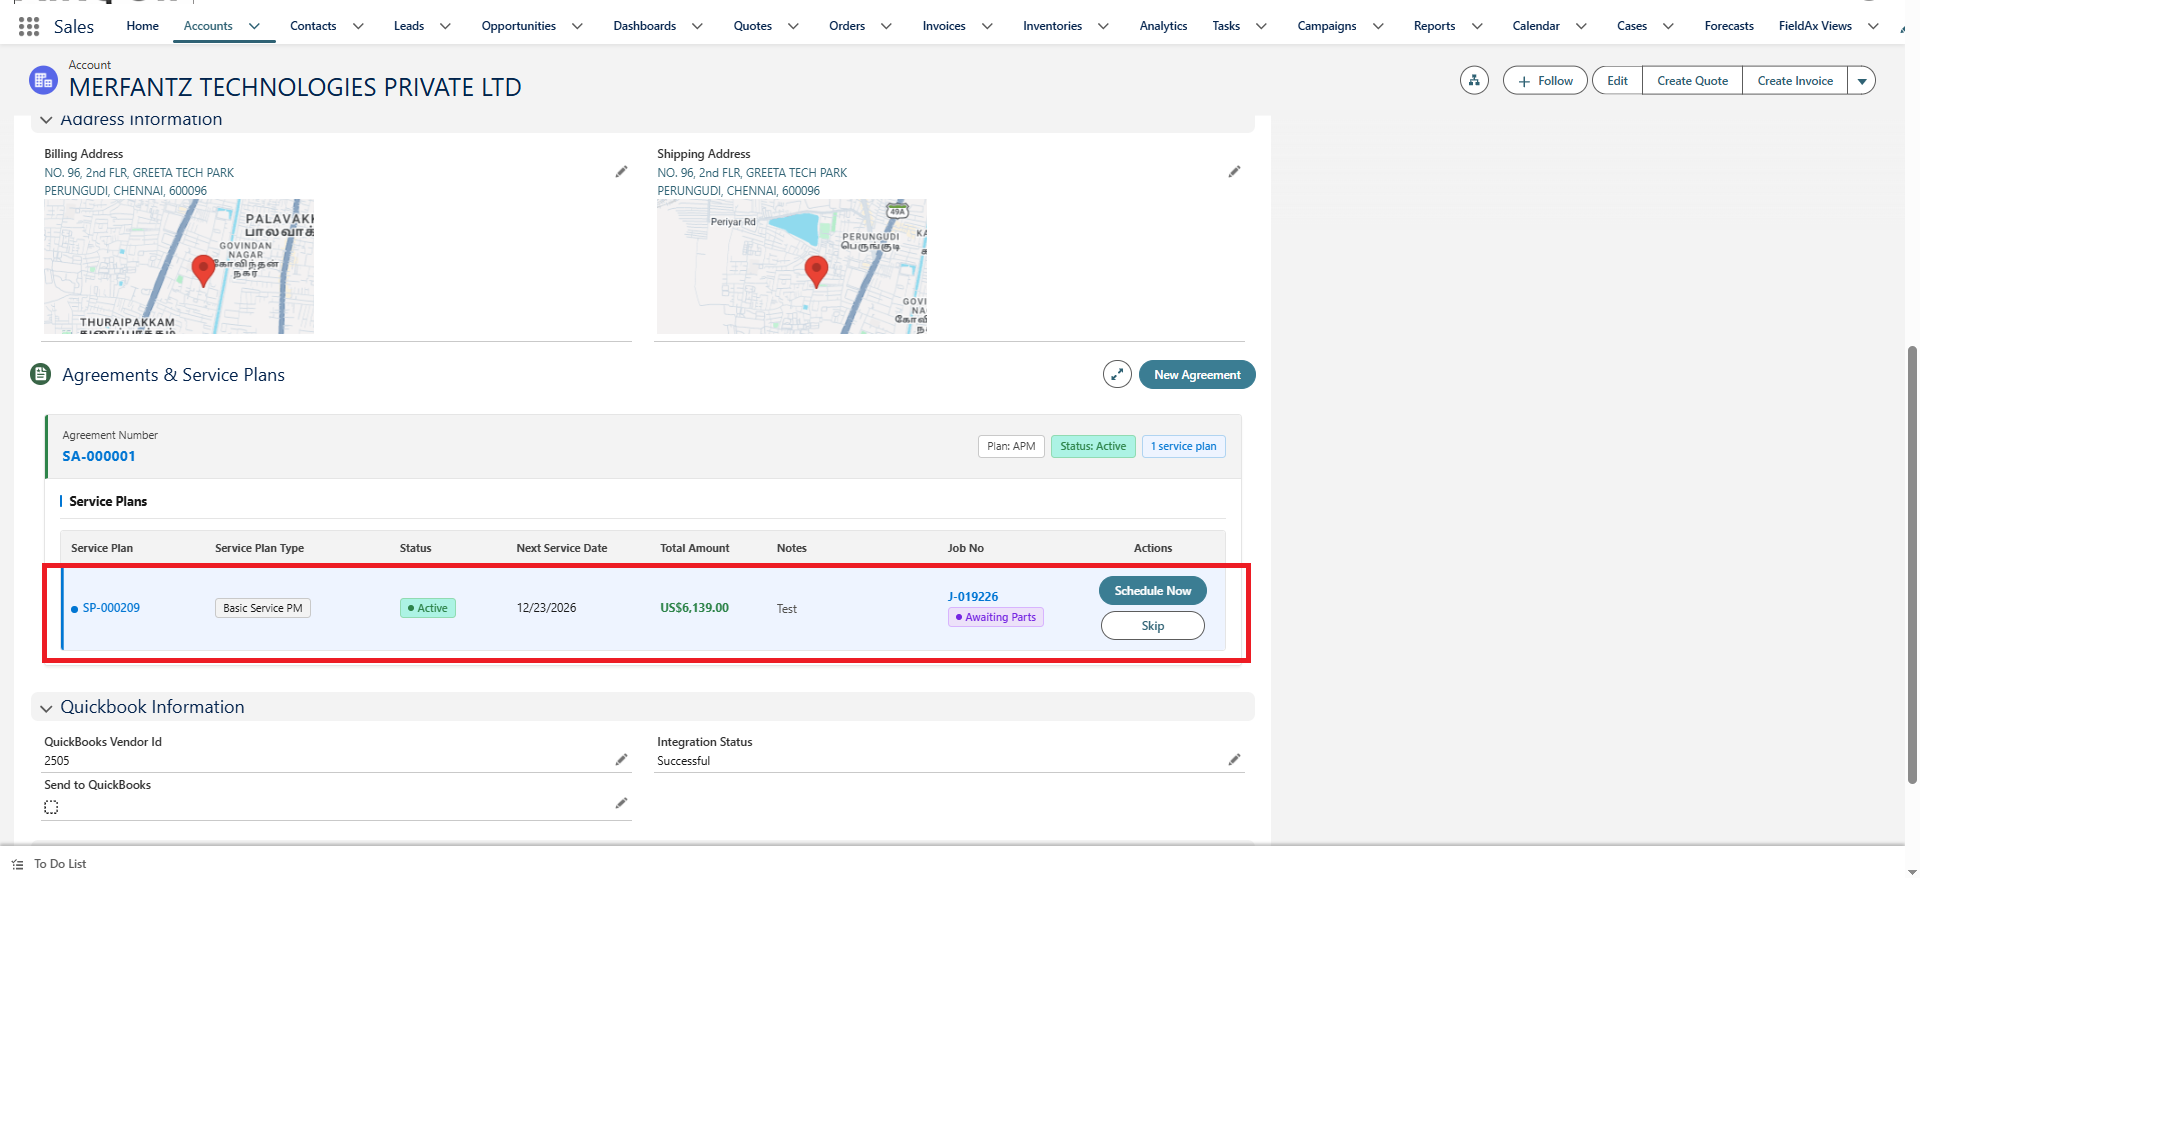
Created Service Plan from Account page
Return to the customer Account and refresh the Agreements & Service Plans section if required. The Agreement should display its status and the number of associated Service Plans. The Service Plan summary can include its status, next service date, total amount, notes, and related Job information.
Summary
The demonstrated workflow provides a structured way to create and manage customer service agreements. First, create the Agreement with the customer, contact, plan, status, contract date, and notes. Next, add a Maintenance Schedule to create the Service Plan. Define the service type and coverage dates, link the appropriate equipment, and add any required non-billable or billable/service parts.
After saving the Service Plan, verify that it appears under the Agreement and on the customer Account. The service can then be managed using the Schedule button to create a Job or the Skip button to update the Next Service Date when the current service needs to be skipped.