
1. Job Completion
The invoice creation process starts from the Job record. Once all required Job activities and checklist information have been completed, the user can complete the Job using the Complete action.
- Open the required Job record.
- Click the Complete button from the Job actions.
- The system processes the Job completion and creates the related Invoice.
- The Invoice is generated using the information available on the Job and its Job Items.
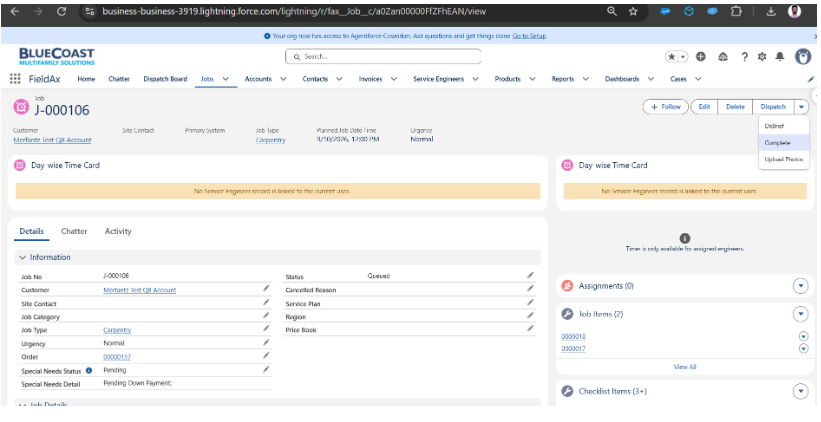
Figure 1 – Job record with the Complete action.
2. Invoice Creation from Job Items
When the Job is completed, an Invoice is created for the Job. The Invoice Line Items are created from the Job Items associated with that Job.
- Each applicable Job Item is used to create an Invoice Line Item.
- The Invoice Line Item carries the relevant item/part information, quantity, and unit price from the Job Item.
- The resulting Invoice contains the line items generated from the Job Items.
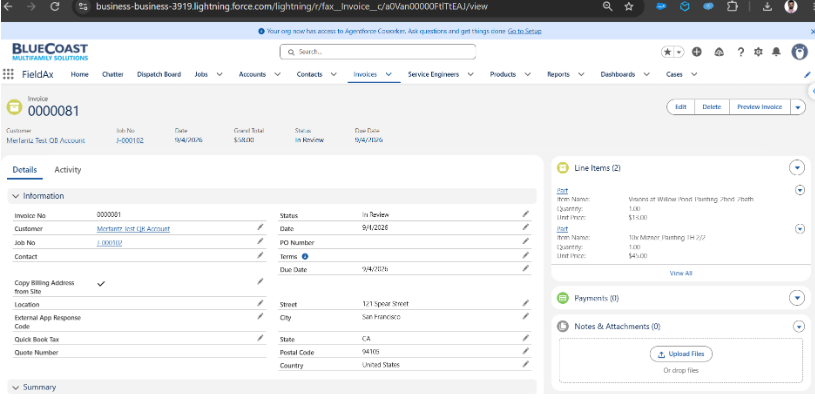
Figure 2 – Job Items displayed on the Job record.
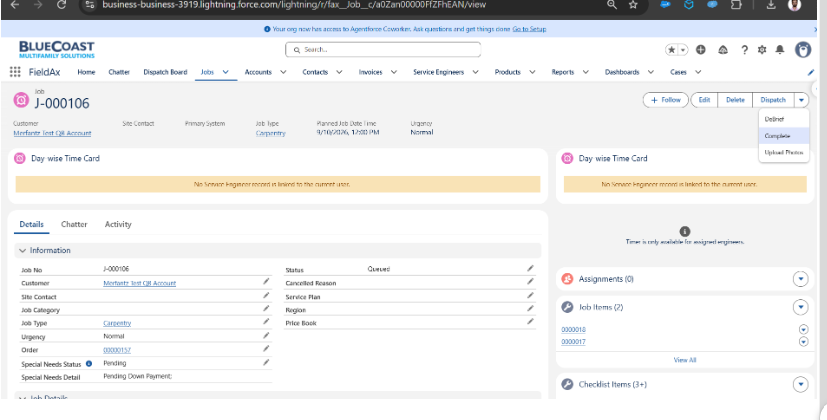
Figure 3 – Invoice record with Invoice Line Items.
3. Invoice Record
The generated Invoice contains the invoice header information and related Invoice Line Items. The Invoice record provides details such as the Invoice Number, Customer, Job Number, Invoice Date, Status, Due Date, billing information, and the associated line items.
- The Invoice is related back to the originating Job.
- The Line Items section displays the items created from the Job Items.
- The Invoice can be previewed using the Preview Invoice action.
4. Invoice Preview
Clicking the Preview Invoice button opens the Invoice PDF Preview. The preview presents the invoice details first and then includes photographs associated with the completed Job.
- The invoice overview displays the Invoice Number, Job Number, Invoice Date, Due Date, Status, PO Number, Customer/Property, Terms, and contact/billing information as applicable.
- Invoice Line Items and invoice totals are included in the invoice document.
- The preview also includes Job photographs in the sections described below.
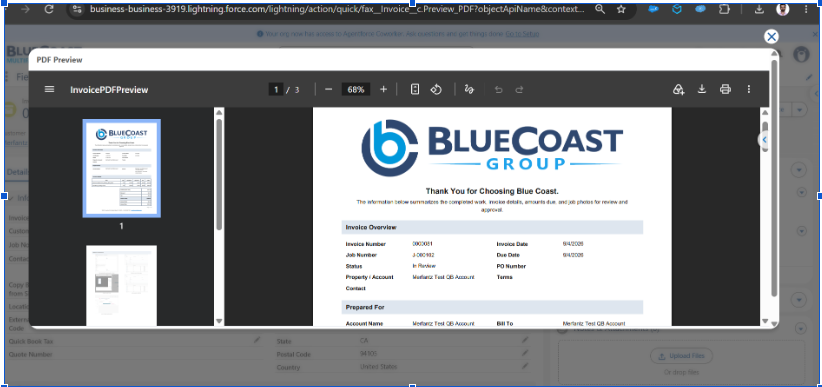
Figure 4 – Invoice PDF Preview showing invoice details.
5. Before Photos and After Photos
The Invoice Preview includes Before Photos and After Photos captured through the Checklist on the Job. These photographs provide visual evidence of the Job condition before the work and the result after the work.
- Before Photos are sourced from the Checklist photos captured for the Job.
- After Photos are sourced from the Checklist photos captured for the Job.
- The photographs are included below the invoice details in the Invoice Preview.
- This allows the customer or reviewer to see the work documentation together with the invoice.
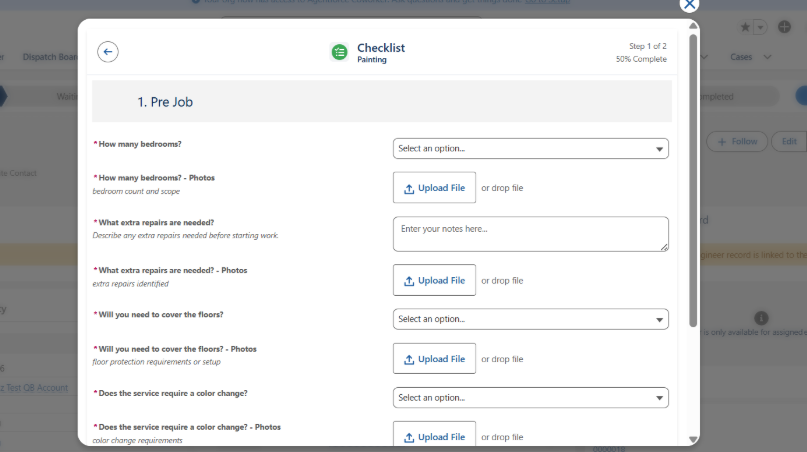
Figure 5 – Job Checklist containing photo upload fields.
6. Job Photos Uploaded Using Upload Photos
In addition to Checklist photos, users can upload photos directly from the Job using the Upload Photos action. These photos are included in the Photos section of the Invoice Preview.
- Open the Job record.
- Select the Upload Photos action.
- Upload the required Job photographs.
- The uploaded photographs are associated with the Job.
- When the Invoice Preview is generated, these photos are displayed in the Photos section.
Figure 6 – Job actions including Upload Photos.
7. End-to-End Process Summary
| Step | Process | Description |
| 1 | Complete the Job | Click Complete on the Job record. |
| 2 | Create Invoice | The system creates the Invoice for the completed Job. |
| 3 | Create Invoice Line Items | Invoice Line Items are created from the Job Items. |
| 4 | Capture Checklist Photos | Before and After photos are captured through the Job Checklist. |
| 5 | Upload Job Photos | Additional photos can be uploaded using Upload Photos on the Job. |
| 6 | Preview Invoice | Click Preview Invoice to generate the Invoice PDF Preview. |
| 7 | Display Documentation | The preview shows invoice details followed by Before Photos, After Photos, and the additional Photos section. |
8. Process Flow
Job
↓
Click Complete
↓
Invoice Created
↓
Invoice Line Items Created from Job Items
↓
Checklist Before / After Photos + Job Uploaded Photos
↓
Click Preview Invoice
↓
Invoice Details + Before Photos + After Photos + Photos Section
9. Important Notes
- The Invoice is created as part of the Job completion process described above.
- Invoice Line Items are based on the Job Items associated with the Job.
- Checklist photos are used for the Before Photos and After Photos sections.
- Photos uploaded directly from the Job using Upload Photos are shown in the Photos section.
- The Invoice Preview combines billing information and Job documentation into a single preview.